True can control isn’t just muscle memory—it’s mastering the physics of aerosol and the unwritten rules of the culture.
- Your can, cap, and hand speed form a system that must be tuned, not just practiced.
- Environmental factors like temperature drastically alter can pressure and paint flow, requiring strategic adjustments.
- Real respect in the graffiti world comes from technical skill, knowledge, and adherence to cultural protocols.
Recommendation: Stop blaming the paint and start understanding the science. Treat your respirator as seriously as you treat your can.
Every writer has been there: the line that was supposed to be a razor-sharp outline comes out fuzzy, a clean fill turns into a drippy mess, or a simple tag just doesn’t pop. The common wisdom is always the same: “Just practice more, kid.” But what if that’s only half the story? Practice builds muscle memory, sure, but it doesn’t teach you the ‘why’ behind a perfect line. It doesn’t explain the physics of atomization, the dynamics of can pressure, or the chemistry of paint in different temperatures. Getting good is one thing; becoming a master is another.
This isn’t about simply grabbing a can and hitting a wall. This is about understanding your primary tool on a fundamental level. True aerosol mastery comes from knowing how the components—the can’s internal pressure, the paint’s viscosity, the cap’s aperture, your hand’s speed, and even the weather—all interact. It’s the difference between a writer who can execute a piece and an artist who can command the medium. The street doesn’t care about excuses; it only recognizes clean lines, solid fills, and undeniable style. That level of control isn’t magic, it’s science.
But technical skill is void without context. Beyond the can, there’s a deep-rooted culture with its own language and codes of conduct. Understanding the unwritten rules of respect between crews is just as crucial as knowing which cap to use for a detail. This guide breaks down the science of can control and the culture that surrounds it. We’ll move from the nozzle to the wall, from paint chemistry to crew etiquette, giving you the knowledge to not only improve your technique but to truly earn your place in the scene.
This guide breaks down every element of can control, from the hardware in your hand to the unwritten laws of the street. Explore the sections below to deconstruct the art and science of aerosol mastery.
Table of Contents: A Breakdown of Aerosol Can Control
- Fat Cap or Skinny Cap: Which Nozzle Do You Need for Tags vs. Details?
- How to Move Your Hand Speed to Stop Paint from Running Down the Wall?
- Montana Gold or Hardcore: Which Can is Better for Character Work?
- The Winter Freeze: Why Your Cans Won’t Spray in December and How to Fix It?
- Why a Bandana Won’t Save Your Lungs from Nerve Damage caused by Solvents?
- Spray or Brush: Which Varnish Application Preserves the Brushwork Texture?
- The Fuzzy Edge: Why Spray Adhesive is Critical for Crisp Stencil Lines?
- Graffiti Culture: What Are the Unwritten Rules of Respect Between Crews?
Fat Cap or Skinny Cap: Which Nozzle Do You Need for Tags vs. Details?
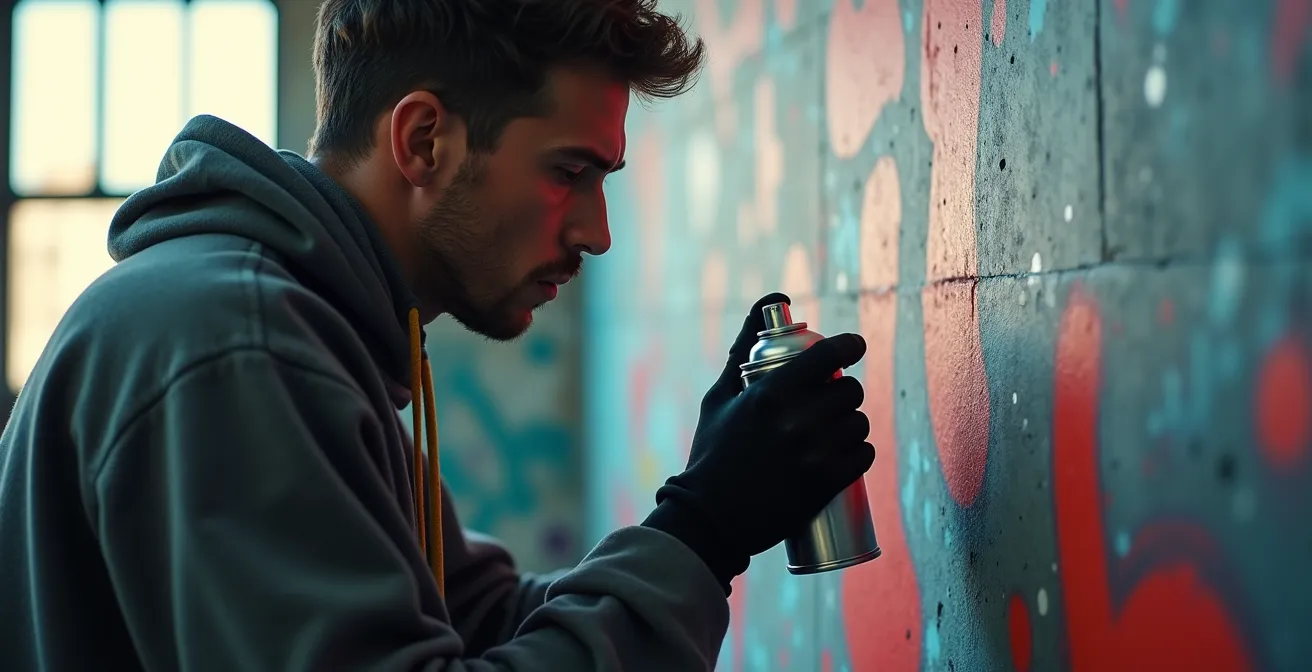
Your cap is the first and most critical point of control. It’s the lens that focuses the power of the can. Thinking you can do everything with one stock cap is like a photographer thinking one lens is enough. The choice between a fat cap and a skinny cap is the most basic distinction, but the world of nozzles is far more nuanced. There are essentially 6 main categories of spray paint caps, each engineered for a specific output, from ultra-thin lines for intricate details to massive flares for filling large areas in seconds.
For big, bold tags and quick fills on a large piece, a fat cap is your weapon of choice. It releases a high volume of paint quickly, creating a wide, powerful line. This is about speed and coverage. On the other side, the skinny cap is for precision. It delivers a fine, controlled spray, essential for character details, clean outlines, highlights, and complex lettering. Mastering the skinny cap is what separates the clean technician from the sloppy bomber. But don’t just think in terms of fat vs. skinny; think about the relationship between the cap’s output and the can’s pressure. A skinny cap on a high-pressure can will behave very differently than on a low-pressure can, giving you a harder, sharper line.
To truly understand the difference, you have to look at the data. The width of the spray can vary dramatically between levels, as shown by industry guides. To help you choose the right tool for the job, this following guide breaks down the most common cap levels and their ideal applications, based on a comprehensive spray paint guide.
| Cap Type | Spray Width | Best Use |
|---|---|---|
| Level 1 (Super Skinny) | 0.4-1.5cm | Fine details, hard-to-reach areas |
| Level 2 (Skinny) | 0.6-2.5cm | Details, small craft objects |
| Level 3 (Medium) | 1-4cm | Soft edge work, medium coverage |
| Level 4 (Fat) | 3-10cm | Filling medium-large areas |
| Level 5 (Super Fat) | 4-15cm | Large area coverage |
Experimenting is key. Mix and match brands. A German Outline cap on a high-pressure can might give you the unique line quality you’ve been looking for. Your cap is your signature just as much as your handstyle is.
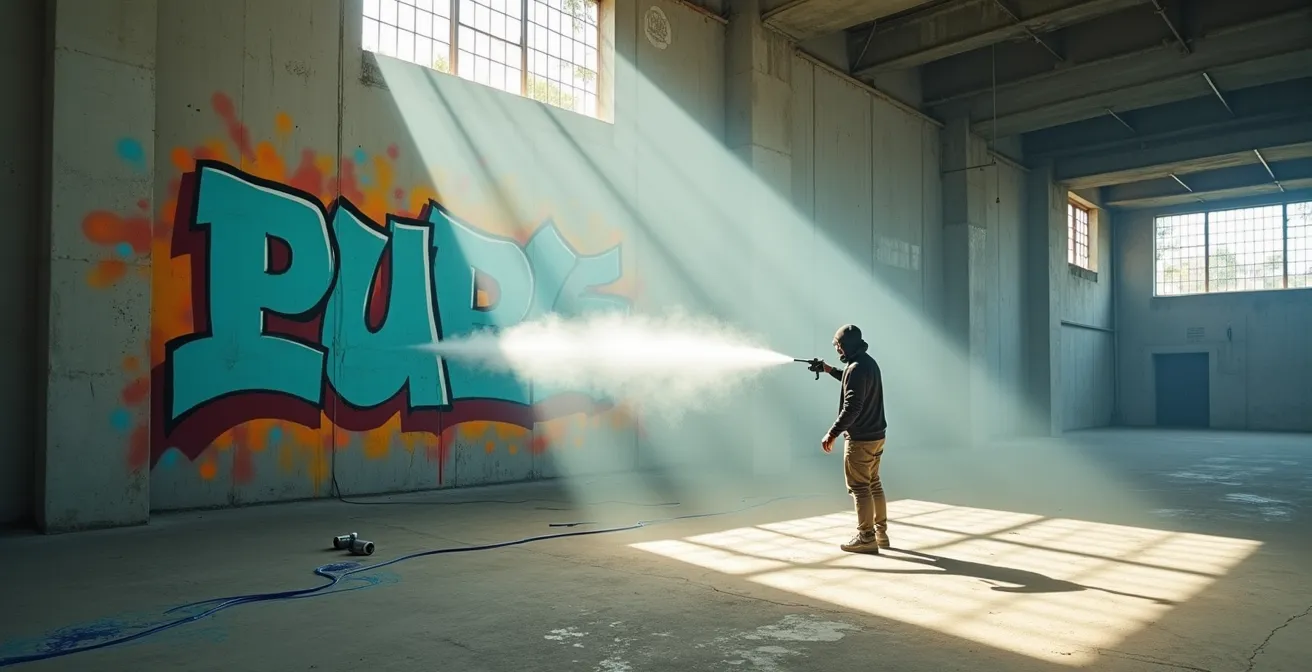
How to Move Your Hand Speed to Stop Paint from Running Down the Wall?
Drips are the enemy of clean work. They scream “toy” louder than anything else. While the right cap and can pressure are part of the equation, the most common cause of drips is flawed technique, specifically incorrect distance and, most importantly, inconsistent hand speed. If your hand slows down or stops for even a split second while the cap is pressed, paint will pool and run. Speed is your shield against drips. The faster you move your hand, the thinner and cleaner the line. It’s a fundamental principle of aerosol physics: you’re spreading the same amount of paint over a larger surface area.
But “moving fast” isn’t enough. The movement must be controlled and come from your whole body, not just your wrist or elbow. This is where biomechanics come in. For long, straight lines, you should lock your arm and move your entire torso, keeping your legs loose and fluid. For vertical lines, drop your whole body by bending your knees, rather than just moving your arm down. This full-body movement ensures a consistent speed and distance from the wall, which are the two pillars of clean line work. Your body becomes the machine, and your arm is just the delivery system.
As the image demonstrates, proper posture and engagement of your core and legs provide a stable platform for the arm to execute the spray. This holistic approach to movement is what allows for unwavering consistency across large surfaces.
The Three Pillars of Can Control
Professional graffiti training, like the methods taught at Machine Studio’s graffiti school, emphasizes a trifecta of can control. First is Distance: too far and the line becomes a fuzzy, oversprayed mess; too close and the pressure causes the paint to splatter and drip. Second is Speed: a faster, more confident hand movement creates sharper, thinner lines and is the ultimate defense against runs. Finally, there’s Can Angle: keeping the can perfectly parallel to the wall is critical. Angling it, especially when reaching for the high or low points of a letter, will cause the spray to flare on one side, ruining the line’s uniformity.
The goal is to make the movement so natural that you’re no longer thinking about it. You’re thinking about the letter, the form, the flow. Your body just executes.
Montana Gold or Hardcore: Which Can is Better for Character Work?
The “best” can is a myth; the “right” can for the job is a reality. When it comes to detailed character work versus blasting a quick throw-up, the choice of paint is defined by one primary factor: pressure. Your can is either low-pressure or high-pressure, and this dictates its control and coverage speed. For beginners, the consensus is clear: start with low-pressure. Brands like Montana Gold, MTN 94, and Flame Blue are often cited as the top 3 low-pressure brands for beginners because their gentle output allows for a more forgiving learning curve.
For character work, which demands blending, fine lines, and subtle gradients, a low-pressure can is your best friend. Montana Gold and MTN 94 are the industry standards for this. Their low pressure means paint is released more slowly and gently, giving you maximum control to layer colors and pull off detailed effects without accidental drips or blowouts. You can get up close to the wall with a skinny cap and work on the intricate parts of a face or the sharp edge of a design. It’s a painter’s tool, designed for finesse.
On the other hand, high-pressure cans like Montana Black or MTN Hardcore are built for speed and power. They eject a large volume of paint very quickly, making them ideal for filling in large areas, bombing, and getting a piece done fast. Trying to do fine detail work with a Hardcore can is like trying to do surgery with a sledgehammer—it can be done by a master, but it requires incredible speed and experience. For most writers, high-pressure means fills and outlines, not delicate character details.
The difference in performance is directly tied to the paint’s formulation and the can’s valve system. An analysis of popular paint brands reveals a clear division of labor based on pressure, which is crucial for any artist to understand. This is a core concept that, according to an in-depth industry analysis, defines an artist’s workflow.
| Paint Type | Pressure Level | Best For | Control Level |
|---|---|---|---|
| Montana Gold | Low | Detailed work, fine lines | High control, fewer drips |
| MTN 94 | Low | Blending, character details | Maximum control for beginners |
| Montana Black | High | Quick fills, large pieces | Requires experience |
| Flame Orange | High | Fast coverage | Lower control, more drips |
| KOBRA | High | Big pieces, time-sensitive work | Professional level needed |
Ultimately, a seasoned writer has both in their bag. They’ll use Hardcore to fill the big shapes and switch to 94 or Gold for the details that make the character come alive.
The Winter Freeze: Why Your Cans Won’t Spray in December and How to Fix It?
There’s nothing more frustrating than getting to a wall in the dead of winter, ready to paint, only to have your cans sputter and die. It’s not the can’s fault; it’s physics. Aerosol cans operate based on the ideal gas law: the propellant inside is a liquified gas that needs a certain amount of heat to maintain pressure. When the temperature drops, the pressure inside the can plummets. Your low-pressure can becomes a no-pressure can, and the paint, now thicker due to the cold, refuses to come out, especially through a skinny cap.
The problem is compounded by a second physical principle: solvent evaporation. As you spray, the rapid expansion of gas and evaporation of solvent actually cools the can and the surface you’re painting on, making a cold situation even worse. This effect is especially noticeable when using fat caps to cover large areas, as the can can literally become frosted over. Spanish-made cans like MTN 94 are particularly vulnerable, as they are formulated for warmer Mediterranean climates.
The Science of a Freezing Can
Technical analysis shows that the process of paint drying is an endothermic reaction; the evaporation of solvents requires energy, which it draws from its surroundings in the form of heat. This causes a significant drop in both can and surface temperature. It’s the same reason you feel cold after getting out of the water on a windy day. When a writer uses a fat cap, they are rapidly decompressing a large volume of gas, which, according to thermodynamic principles, causes a massive temperature drop inside the can, further reducing pressure and flow.
So, how do you fight the freeze? First, ditch the skinny caps on low-pressure cans; they’ll clog instantly. Use fat caps exclusively to ensure enough paint can get through. Second, consider your paint choice. High-pressure cans like MTN Hardcore or paints with finer pigments like Molotow tend to perform better in the cold. Third, and most importantly, keep your cans warm. Keep them inside your jacket, close to your body, and only take one out at a time. Some old-school writers even use a bucket of warm (not hot!) water to bring them up to temperature. Finally, apply paint in multiple thin layers. A thin layer can dry in a minute, while one thick, cold layer can stay wet and tacky for ages.
Painting in the winter is a test of your knowledge and preparation. A writer who understands the science can get up on the coldest night of the year, while a less-informed one is left with a bag of useless, sputtering cans.
Why a Bandana Won’t Save Your Lungs from Nerve Damage caused by Solvents?
Let’s get one thing straight: the classic image of a writer with a bandana over their face is for identity, not safety. It does absolutely nothing to protect you from the real dangers of spray paint. A bandana is just cloth; it might stop a few large dust particles, but it’s completely useless against the two main threats: aerosolized paint particulates and, far more insidiously, organic solvent vapors. These solvents—chemicals like xylene and toluene—are what keep the paint liquid, and they are neurotoxic. We’re talking about the risk of permanent nerve damage, not just a cough. They pass straight through a bandana and go directly into your bloodstream via your lungs.
To protect yourself, you need a proper respirator, specifically a dual-cartridge half-mask. This isn’t optional; it’s a career-defining piece of equipment. The mask must have two types of filters working in tandem. First, a particulate filter (look for a P100 rating) to stop the physical paint particles. A proper P100 filter, according to respirator safety specifications, removes 99.97% of all airborne particles. This is the part that gets coated in paint.
Second, and most critically, you need an organic vapor (OV) cartridge. This is typically a charcoal-based filter that chemically absorbs the harmful solvent vapors. You can’t see it working, but you’ll know it is: if you can smell the paint through your mask, the seal is bad or the cartridges are spent and need to be replaced. Protecting your lungs is about using the right technology, as seen in the complex filtration layers of a professional respirator.
Your Action Plan for Respirator Safety
- Choose a dual-cartridge respirator with both an active organic vapor (charcoal) cartridge and a P100-rated particulate filter.
- Ensure a perfect seal between the mask and your face. Test for air leaks. Excessive facial hair will break the seal and render the mask useless.
- Perform a smell test: if you can smell paint fumes while wearing the mask, it has failed. Adjust the fit or replace the cartridges immediately.
- Replace the outer cotton particulate filters when they become visibly coated in paint. Replace the OV cartridges based on manufacturer recommendations or as soon as you can smell fumes.
- Store your mask in a sealed bag when not in use to prolong the life of the charcoal filters, which absorb contaminants from the ambient air.
A long career in graffiti isn’t just about avoiding the cops; it’s about avoiding the long-term health consequences of the very tool you use to create. Take it seriously.
Spray or Brush: Which Varnish Application Preserves the Brushwork Texture?
After you’ve put in the hours on a canvas or a commissioned mural, the final step is to protect it. Varnish is the shield that guards your work against UV rays, dust, and grime. But the application method can make or break the final piece, especially if your work has a lot of physical texture from brushwork or other mixed-media elements. The big question is whether to use a spray varnish or a brush-on varnish. While a brush-on application gives you a thick, durable coat, it has a major drawback: it tends to level itself out, filling in the subtle valleys of your brushstrokes and creating a flat, uniform surface. This can kill the dynamic, textural quality of the piece.
For preserving texture, spray varnish is almost always the superior choice, but only if applied correctly. The mistake most people make is to apply one or two heavy, wet coats. This floods the surface, and just like a brush-on varnish, it will pool in the crevices and flatten the texture. The professional technique is to apply multiple, very thin “dust coats.” This involves spraying from a greater distance than you would with paint—around 12-18 inches—and moving quickly across the piece.
The “Dust Coat” Varnish Technique
Professional artists seeking to preserve texture rely on building up protection gradually. By applying several light “dust coats” from a distance, each layer of varnish partially dries before the next is applied. This method prevents the varnish from pooling and creating a single, thick sheet of acrylic. Instead, it forms a protective layer that conforms to the existing surface topography, preserving every detail of the brushwork. Furthermore, the choice of finish—matte, satin, or gloss—will dramatically alter how light interacts with this preserved texture, offering another layer of artistic control.
Before you even think about varnish, many artists apply a non-removable isolation coat. This is a clear acrylic medium that acts as a permanent barrier between the painting and the final, removable varnish. This way, if the varnish ever needs to be cleaned or replaced in the future, the cleaning solvents will remove the varnish layer without ever touching the actual paint. It’s a critical step for archival-quality work. The key is patience: allow each thin layer of spray to fully dry (15-30 minutes) before applying the next.
Your work isn’t finished when the last color is applied. It’s finished when it’s properly protected for the future, with all its original character intact.
The Fuzzy Edge: Why Spray Adhesive is Critical for Crisp Stencil Lines?
Every stencil artist knows the frustration of the “fuzzy edge” or “underspray.” You cut the perfect design, place it on the wall, spray it, and when you peel it back, the edges are blurry and paint has bled underneath. This happens because paint doesn’t just travel in a straight line from the nozzle to the wall. It’s atomized into a fine mist suspended in gas, and this cloud of paint has a tendency to curl around the edges of the stencil due to air pressure dynamics. No matter how tightly you hold the stencil, microscopic gaps will allow paint to seep in.
The solution is not to press harder; it’s to create a perfect seal. This is where repositionable spray adhesive becomes an indispensable tool. A light mist of spray tack on the back of your stencil creates a micro-seal that physically blocks paint particles from creeping under the edges. It holds every intricate part of the stencil flush against the surface, ensuring that the only place paint can go is through the cut-out areas. The result is a crisp, razor-sharp line that’s impossible to achieve by hand alone.
The choice of adhesive depends on your surface and stencil. For smooth walls and multi-layer stencils that need to be placed and replaced accurately, a low-tack repositionable adhesive is ideal. For rough surfaces like brick or concrete, a stronger high-tack adhesive might be necessary to get into the grooves and create a good seal, though it may be for single-use stencils. The technique is to apply a very light, even coat to the stencil and let it tack up for a minute before positioning it.
The Physics of Underspray
Technical analysis reveals that the high-velocity cloud of paint and propellant leaving the nozzle creates turbulence at the boundary layer of the stencil. This turbulence, combined with the natural tendency of pressurized gas to fill any available space, forces fine paint particles under the stencil’s edge. Spray adhesive works by eliminating that space entirely, creating a temporary bond that is stronger than the air pressure trying to force its way in. For ultimate control in this scenario, a cap like the Euro Outline Cap, which provides a highly defined and controlled spray, is often recommended by experts for minimizing the initial blast of overspray.
It’s a simple step, but using spray adhesive is a non-negotiable part of professional stencil work. It’s the difference between a blurry approximation and a perfect replication of your design.
Key Takeaways
- Can control is a system: The can’s pressure, the cap’s design, and your hand’s speed must be tuned together for predictable results.
- Physics dictates flow: Cold temperatures kill can pressure and thicken paint. Understanding this allows you to adapt your tools and techniques to any environment.
- Safety is non-negotiable: A bandana is not a respirator. Protecting your lungs from neurotoxic solvents with a proper dual-cartridge mask is essential for a long and healthy career.
Graffiti Culture: What Are the Unwritten Rules of Respect Between Crews?
Mastering the can is the technical side of graffiti. But a writer who doesn’t understand the culture is just a vandal with good technique. The graffiti world operates on a complex, unwritten code of ethics and respect. Violating these rules can get your work crossed out, earn you a bad reputation, or worse. The most fundamental rule is this: do not go over another writer’s work unless you are prepared to start a “beef.” Going over a piece is the ultimate sign of disrespect. The only exception is if the piece you are covering is old, faded, or a simple “throw-up” and you are replacing it with a superior “burner” piece—and even that can be risky.
Respect is a hierarchy. You respect the writers who came before you—the “kings” and “old-timers” who paved the way. You don’t go over their work, period. You study their style and pay homage. Within your own crew, respect is about loyalty and contribution. It’s about showing up, putting in work, watching each other’s backs, and pushing the crew’s name. A writer’s identity is tied to their name and their crew; recent graffiti statistics reveal that over 80% of graffiti artists use pseudonyms or aliases precisely to build this reputation while protecting their real-world identity.
The culture also has rules about space. Certain walls are known “halls of fame” or legal walls where quality is expected. Hitting a “heaven” spot—a location that’s incredibly difficult or dangerous to reach—earns a massive amount of respect. Conversely, tagging certain places like active places of worship or private homes is generally frowned upon and seen as clueless. It’s about knowing the difference between making a statement and being a public nuisance. This deeper understanding of community and public space is at the heart of the art form’s purpose.
Street art is bringing the art into the public space and bringing it back into the hands of the people. We are taking ownership of the public spaces.
– Mohammad Ali (Aerosol Arabic), Knowledge at Wharton Interview
Your can control can get you noticed, but your respect for the culture is what will allow you to last. Know the rules, know the history, and earn your spot on the wall.