
The magnetic pull of impasto isn’t just visual; it’s the appreciation of the painting as a fragile, sculptural object.
- Its 3D surface is an unstable chemical structure that requires months to cure and is prone to specific physical failures.
- Proper display isn’t about visibility, but about using light and framing to reveal its topographical depth.
Recommendation: Treat your impasto piece with the care of a sculpture, considering its weight, fragility, and interaction with its environment.
There’s a moment when you stand before a painting, and it reaches out to you—not just emotionally, but physically. The paint lifts from the canvas, forming peaks, ridges, and valleys that capture the light and the artist’s energy. This is the visceral power of impasto. While many appreciate its expressive, tactile qualities, they often mistake it for mere “texture.” This perspective misses the fundamental truth of the medium. An impasto painting is more than an image; it is a low-relief sculpture crafted from a volatile chemical medium.
To truly understand its allure is to move beyond the surface-level aesthetics and delve into its physical reality. This isn’t just about appreciating the artist’s gesture with a palette knife. It’s about recognizing the painting as a living object with its own structural integrity, one that is constantly reacting to its environment. The common advice focuses on visual appeal, but the real conversation for a discerning collector involves the science of curing, the engineering of framing, and the physics of light.
But if the real key to appreciation lies not in what you see, but in understanding the physical object itself? The pull of impasto is the pull of something real, something tangible in a digital world. It has a presence, a weight, and a fragility that demand respect. This guide explores the practical and technical considerations that transform a viewer into a knowledgeable custodian. We will explore the critical curing timeline, the structural mechanics of framing and hanging, the science of lighting, and the conservation-minded approach to transport and maintenance that ensures this three-dimensional art endures.
For those who prefer a dynamic visual format, the following video offers a compelling look at the digital creation of an impasto effect, capturing the essence of textural depth and light play that makes this technique so captivating.
To fully grasp the responsibilities and joys of owning such a piece, this article breaks down the essential knowledge every collector should possess. The following sections provide a comprehensive overview of how to care for, display, and preserve the unique sculptural beauty of impasto paintings.
Summary: A Collector’s Guide to the Sculptural Nature of Impasto Art
- Why Thick Impasto Takes 6 Months to Cure and What Happens If You Rush It?
- How to Frame Impasto: The Shadow Box Method You Must Use
- Expressive vs. Academic: Which Style Suits a Modern Minimalist Interior?
- The ‘Fat Over Lean’ Error That Cracks Impasto Paintings in 3 Years
- Where to Hang Impasto Art to Maximize the Shadow Play Throughout the Day
- Why Your Heavy Impasto Painting Might Need Reinforced Wall Anchors?
- How to Position Your Home Lighting to Enhance Texture Without Creating Glare
- Heavy Impasto Relief: How to Transport and Maintain 3D Paintings Without Cracking?
Why Thick Impasto Takes 6 Months to Cure and What Happens If You Rush It?
From an artist’s perspective, the most misunderstood aspect of oil paint is the drying process. It isn’t “drying” in the way water evaporates; it’s a slow chemical reaction called oxidation and polymerization. The oil absorbs oxygen from the air, causing its molecules to link together and harden into a solid, durable film. In a thin paint layer, this is relatively straightforward. But within the dense, sculptural mass of impasto, the process is dramatically slowed. The surface may feel “touch-dry” in a matter of days or weeks, but this is a dangerous illusion. Beneath this skin, the paint remains wet and volatile.
Rushing this stage has catastrophic consequences. If a painting is varnished or tightly framed too early, you essentially suffocate it. The trapped solvents in the lower layers cannot escape, leading to a soft, unstable core. Over time, this can cause the surface to wrinkle, sag, or develop a texture like elephant skin. In the worst cases, the entire paint structure can delaminate from the canvas. This is why conservation experts recommend waiting 6 to 18 months minimum before considering any varnishing for thick impasto works. This period allows the entire paint body to achieve a foundational level of structural integrity, ensuring its long-term stability.
So, can you varnish an impasto painting? Yes, eventually. But patience is not a virtue here; it’s a technical necessity. Attempting to accelerate the process is the single most common cause of premature failure in heavily textured paintings. A true collector understands that the artwork is still, in a chemical sense, completing its own creation long after it has left the artist’s studio.
How to Frame Impasto: The Shadow Box Method You Must Use
Framing an impasto painting is not a decorative choice; it is a structural and conservational decision. Standard frames, which press glass or acrylic directly against the artwork, are disastrous for textured pieces. The pressure can compress and flatten the delicate paint peaks, causing irreparable damage and potentially transferring paint to the glazing. The artwork’s three-dimensional surface, its very essence, requires space to exist without contact. This is where specialized framing becomes essential, treating the painting less like a print and more like a contained sculpture.
The challenge is so significant that it has long been a focus for museum conservators. As one case study shows, the iconic impasto of Vincent van Gogh continues to pose challenges. To protect works like The Starry Night, museums employ custom shadow boxes with a depth of 2-3 inches. This creates a safe, contained environment, ensuring no physical contact with the fragile paint surface and preventing the compression damage that would occur with conventional framing.
For collectors, the two primary options are the floater frame and the shadow box. While a floater frame can be suitable for works with modest texture, the shadow box is the only truly safe method for heavy impasto. It provides the necessary depth to protect the paint’s topography while presenting the artwork as a precious object.
This comparative table breaks down the key differences, making it clear why the shadow box is the superior choice for protecting significant textural work.
| Feature | Floater Frame | Shadow Box |
|---|---|---|
| Depth Capacity | 0.5-1.5 inches | 2-4 inches |
| Visual Effect | Artwork ‘floats’ within frame | Artwork presented as object |
| Best for Peak Height | Under 0.75 inches | Over 0.75 inches |
| Edge Treatment | Edges visible | Edges can be hidden |
| Glazing Option | Usually unglazed | Can accommodate museum glass |
| Price Range | $150-400 | $250-600+ |
Expressive vs. Academic: Which Style Suits a Modern Minimalist Interior?
The dialogue between art and its environment is fundamental to interior design. When it comes to a modern minimalist interior—characterized by clean lines, neutral palettes, and an emphasis on negative space—the choice of art can either complete the vision or shatter it. An academic style of painting, with its smooth finish and controlled composition, often blends in seamlessly, reinforcing the space’s tranquility. However, it can sometimes feel cold or sterile. In contrast, an expressive impasto painting introduces a powerful element of controlled chaos.
This is not a contradiction but a deliberate and sophisticated design strategy. The raw, sculptural texture and vibrant, energetic strokes of an expressive impasto piece act as a powerful counterpoint to the serenity of minimalism. It becomes the singular point of focus, a jolt of human emotion and raw energy in an otherwise highly ordered environment. As the design philosophy in Contemporary Art in Minimalist Spaces states:
A highly expressive, chaotic impasto painting serves as a deliberate, singular focal point of energy and emotion that contrasts with and animates a serene, minimalist space
– Interior Design Philosophy, Contemporary Art in Minimalist Spaces
The painting is not just an accessory; it is the heart of the room, the element that gives it life and personality. Its three-dimensional surface plays with light, creating a dynamic visual experience that changes throughout the day, preventing the space from ever feeling static.
Therefore, for a minimalist interior, an expressive impasto painting is often the more impactful choice. It doesn’t just decorate the space; it activates it, creating a powerful visual tension between the calm of the architecture and the visceral energy of the art. It is a statement of confidence, embracing texture and emotion within a framework of restraint.
The ‘Fat Over Lean’ Error That Cracks Impasto Paintings in 3 Years
One of the foundational rules of oil painting, drilled into every art student, is “fat over lean.” This principle governs the structural integrity of layered paint. “Lean” paint has less oil (thinned with a solvent like turpentine), so it dries faster and is less flexible. “Fat” paint has a higher oil content, making it dry slower and remain more flexible. The rule dictates that each successive layer of paint must be fatter (more oil) than the one beneath it. This allows the layers to cure at a compatible rate, with the faster-drying, rigid layers on the bottom and the slower-drying, flexible layers on top.
Reversing this—placing a lean, fast-drying layer over a fat, slow-drying one—is a recipe for disaster. The top layer will harden and become rigid while the layer beneath it is still moving, shifting, and releasing solvent vapor. Unable to stretch, the brittle top layer will inevitably crack. This isn’t a minor surface issue; it’s a fundamental structural failure. While it may not be visible immediately, conservation studies show that oil paintings become increasingly brittle as they oxidize over their first 3-5 years. An improper layering technique will almost certainly reveal itself as web-like cracking (crazing) or deep fissures within this timeframe.
For a collector, spotting the signs of a “fat over lean” error is a crucial part of due diligence, especially with heavily textured impasto where thick, fat layers of paint are common. These signs indicate a painting with inherent structural flaws that will only worsen over time.
Collector’s Checklist: Spotting Fat Over Lean Errors
- Look for web-like cracking patterns (crazing) appearing within 2-3 years of creation.
- Check for ‘sunken-in’ matte patches where lean paint absorbed oil from layers above.
- Examine thick areas for premature surface wrinkling or ‘elephant skin’ texture.
- Test gently with a fingernail – if paint dents despite being years old, suspect trapped solvents.
- Request provenance on painting techniques and mediums used from the artist.
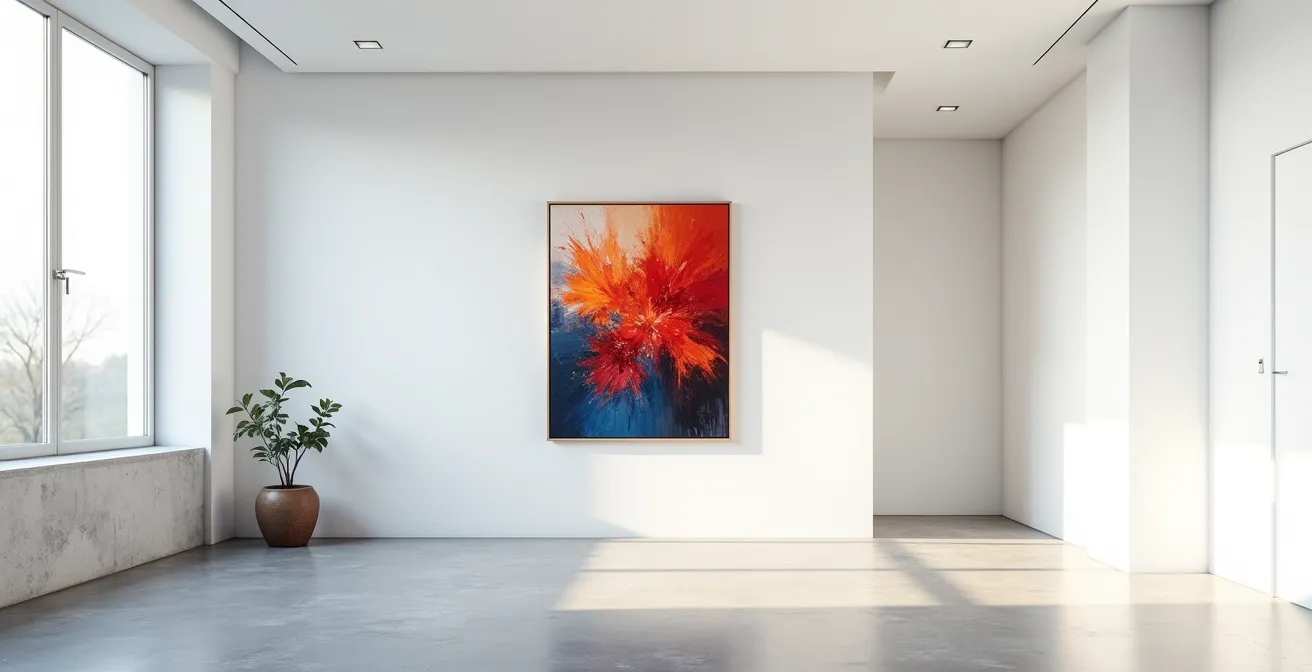
Where to Hang Impasto Art to Maximize the Shadow Play Throughout the Day
Hanging an impasto painting is not just about finding an empty wall; it’s about choreographing a dance between light and texture. A flat, frontal light source, common in many homes, is the worst enemy of impasto. It flattens the surface, bleaching out the shadows and erasing the very three-dimensional quality that makes the work compelling. The goal is not merely to illuminate the painting, but to reveal its topography. This is achieved through a technique known as “raking light.”
Raking light involves positioning a light source at an acute angle to the surface of the artwork. This causes the light to skim across the paint’s peaks, casting dramatic shadows into its valleys. This technique transforms the painting from a static image into a dynamic relief map that changes as the viewer moves or as the ambient light shifts. Professional galleries have perfected this method. For instance, the Tate Modern utilizes adjustable track lighting for its Van Gogh collection, with spotlights meticulously positioned at a 30-degree angle to the vertical surface. This specific angle is considered optimal for creating deep, revealing shadows without producing excessive glare off the paint’s glossy peaks.
For a collector, the ideal location for an impasto work is a wall that receives natural light from the side, such as a wall adjacent to a window. This allows the painting’s texture to come alive throughout the day as the sun moves across the sky. In the evening, this effect can be replicated with a well-placed track light or spotlight. The key is to avoid placing the light source directly in front of or directly above the painting. Instead, think of the light as a tool to sculpt the surface, revealing the energy and gesture embedded in every stroke.

Why Your Heavy Impasto Painting Might Need Reinforced Wall Anchors?
When collecting impasto art, it’s easy to focus on the aesthetics and overlook a simple, crucial fact: this art is heavy. The thick application of oil paint, sometimes mixed with textural mediums, adds significant weight compared to a standard painting on canvas. This weight is not even static; as professional framers note, wet impasto can be 15-20% heavier due to retained solvents, a factor that must be considered when it is first hung. Ignoring the physical mass of the artwork is a risk not only to the piece itself but to the wall it hangs on.
A simple nail or a standard picture hook suitable for a 5-pound print is dangerously inadequate for a 50-pound impasto relief. The structural integrity of your wall and the type of anchor used are critical safety considerations. Drywall, plaster, and masonry each have vastly different load-bearing capacities and require specific types of hardware to securely support heavy objects. Using the wrong anchor can lead to it pulling out of the wall, causing the artwork to fall and likely suffer catastrophic damage from the impact and shattering of the brittle, cured paint.
Therefore, before hanging any significant impasto work, it is imperative to weigh the piece accurately and assess the wall material. Consulting a professional art installer is always the safest option, but if you choose to do it yourself, selecting the appropriate reinforced anchor is non-negotiable. The security of the artwork depends on this crucial, often-overlooked engineering detail.
The following table provides a general guide to the load capacities of common wall anchors, demonstrating the importance of matching the hardware to both the wall type and the artwork’s weight.
| Wall Type | Anchor Type | Weight Capacity | Best For |
|---|---|---|---|
| Drywall (no stud) | Toggle Bolt | 50-75 lbs | Medium impasto works |
| Drywall (into stud) | Wood Screw | 80-100 lbs | Large heavy pieces |
| Plaster | Molly Bolt | 25-50 lbs | Smaller works |
| Masonry/Brick | Lead Shield | 100+ lbs | Very heavy impasto |
| Concrete | Sleeve Anchor | 150+ lbs | Museum installations |
How to Position Your Home Lighting to Enhance Texture Without Creating Glare
Bringing the gallery lighting experience into your home requires more than just pointing a lamp at a painting. It involves a nuanced approach that balances revealing texture with avoiding distracting glare. As we’ve learned, the key is raking light, but its application in a domestic setting demands careful calibration. The goal is to create a “key light” that models the form and a subtle “fill light” to soften overly harsh shadows, creating a sophisticated and inviting ambiance.
Your primary light source, or key light, should be positioned at that crucial 30-degree angle to the wall, about 6 to 8 feet away from the painting. This will create the desired shadow play. However, the quality of this light is just as important as its position. For accurate color representation, select a bulb with a high Color Rendering Index (CRI) of 95 or greater. This ensures the hues you see are true to the artist’s intent. For ambiance, a color temperature of 2700K to 3000K provides a warm, gallery-like glow that is far more pleasing than harsh, cool office lighting.
Glare is the primary enemy of this setup, especially on paintings with a glossy varnish or varied surface sheen. To combat this, installing a dimmer switch is essential. It allows you to adjust the light’s intensity based on the time of day and the amount of natural light in the room. Furthermore, adding a secondary, much weaker “fill” light from a wider, opposing angle can gently soften the deepest shadows cast by the key light, preventing them from becoming black voids and allowing subtle details within the texture to remain visible. Finally, using fixtures with “barn doors” or shields helps control light spill, focusing the beam precisely on the artwork and preventing a distracting halo of light on the surrounding wall.
Key Takeaways
- Curing is a months-long chemical process, not just drying; patience before varnishing is non-negotiable.
- Frame for depth, not just aesthetics; shadow boxes are essential to protect the paint’s three-dimensional peaks.
- Light is a tool; use angled “raking light” to reveal the painting’s topography, not just illuminate its image.
Heavy Impasto Relief: How to Transport and Maintain 3D Paintings Without Cracking?
The final aspect of stewarding an impasto painting is understanding its extreme fragility during transport and the proper methods for its ongoing maintenance. The very three-dimensionality that makes the art compelling also makes it vulnerable. The hardened peaks of paint are brittle and can easily be chipped, cracked, or abraded. During transport, the greatest danger is not necessarily a major impact, but the cumulative damage from micro-vibrations, which can cause existing stresses in the paint film to develop into full-blown cracks.
Professional art handlers have developed specific protocols to mitigate these risks. As detailed in procedures from firms like those servicing reputable suppliers such as Jerry’s Artarama, the standard practice is to build a custom “tent” over the painting’s surface. Using blocks or sheets of Ethafoam, they create a protective cavity several inches above the highest paint peaks. This ensures that no packing materials, such as bubble wrap or blankets, ever touch the fragile surface. For high-value works, this is combined with transport in climate-controlled, air-ride suspension trucks, which dampen vibrations and maintain a constant temperature and humidity, preventing the paint from expanding or contracting.
For the collector, maintenance requires a similarly gentle touch. Dusting should be done every few months with a very soft, clean badger brush, using gentle, flicking motions to lift dust from the crevices without applying pressure to the paint. Canned air should never be used, as the propellants can deposit chemicals that stain or damage the paint surface. If a more powerful air current is needed, only a manual rubber-bulb air blower (like those used for camera lenses) is safe. These practices recognize the painting as a delicate object, preserving its structural and aesthetic integrity for generations.
Frequently Asked Questions on Bold Impasto Strokes: Why Do Collectors Gravitate Toward 3D Paint Effects?
How often should I dust my impasto painting?
Every 3-6 months using a soft badger brush, gently flicking dust from peaks without touching the paint directly.
Can I use compressed air to clean textured paintings?
Only use camera lens blowers with rubber bulbs. Canned air contains propellants that can damage or discolor the paint surface.
What causes impasto paintings to crack during transport?
Micro-vibrations during transit are more damaging than impacts. Professional shippers use vibration-dampening materials and air-ride suspension.