Lasting mixed media art isn’t about breaking rules, but understanding the hidden material science that governs why combinations fail—or succeed spectacularly.
- Most failures, like peeling or sagging, stem from mismatched physical properties like dimensional stability and tensile strength, not just poor glue.
- True innovation comes from creating a stable “bridge” between incompatible layers, whether through chemical isolation coats or mechanical support structures.
Recommendation: Before your next project, stop thinking like an artist and start thinking like a chemist. Analyze the physical and chemical properties of your chosen materials, not just their color or texture.
Every experimental artist knows the heartbreak. You pour your vision into a complex piece, combining textures and materials with creative abandon, only to watch it self-destruct. The acrylic paint peels from an oily surface, the heavy object you so carefully placed begins to sag, or worse, a beautiful organic element starts to decay. You followed the common advice: “use a primer” or the classic “fat over lean” rule. Yet, the work still fails, leaving you frustrated and questioning the limits of your materials.
The problem is that most mixed media advice stays at the surface level, offering rules of thumb without explaining the fundamental principles. It treats art supplies like magic potions rather than what they are: chemicals and compounds with specific physical properties. This approach limits your ability to truly innovate, keeping you locked in a cycle of trial and error where the “error” part is far too common. You can layer paper, fabric, and acrylics, but what about the truly ambitious combinations? Plaster on canvas? Heavy metal on a flexible support? Oil over acrylic?
But what if the key wasn’t just about finding a stronger glue or a better primer? What if the secret to creating stable, archival-quality mixed media art lies in understanding the material science behind the canvas? This guide shifts the perspective from that of a traditional artist to that of a materials chemist. We will dissect the *why* behind common failures, exploring concepts like dimensional stability, mechanical bonds, and chemical reactions. By understanding these core principles, you can move beyond following rules and begin to write your own, enabling you to combine seemingly incompatible materials with confidence and precision.
This exploration will provide a clear, scientific framework for your creative experiments. We will cover the critical interactions between common materials, offering practical solutions grounded in chemistry and physics, so your ambitious visions can finally become lasting realities.
Summary: Mixed Media Innovation: How to Combine Incompatible Materials Successfully?
- Why Acrylic Peels Off Oil and How to Prevent Delamination?
- How to Glue Heavy Objects to Canvas Without It Sagging Over Time?
- Organic Matter or Plastic: Which Decays Faster in a Mixed Media Piece?
- The Fume Hazard: Why Mixing Bleach and Ink creates Deadly Gas?
- Why Canvas is Too Weak for Plaster and What Panel to Use Instead?
- Oil or Acrylic: Which Medium Offers Better Color Depth for the Price?
- Montana Gold or Hardcore: Which Can is Better for Character Work?
- Experimental Resin Art: How to Achieve a Crystal Clear Finish Every Time?
Why Acrylic Peels Off Oil and How to Prevent Delamination?
The “fat over lean” rule is a well-known principle, but it doesn’t fully explain why acrylics (lean) peel off oil-based paints (fat). The core issue is not just about fat content, but about fundamental differences in physical properties. Oil and acrylic paints cure into two vastly different polymer films. Oil paint continues to cure and change for decades, becoming more brittle, while acrylics remain flexible. This creates a critical mismatch in dimensional stability. As temperature and humidity fluctuate, the two layers expand and contract at different rates, causing the acrylic layer to lose adhesion and delaminate.
Scientific data highlights this incompatibility. Research from Golden Artist Colors demonstrates that there is a 1.5% dimensional change in 20-year-old acrylic vs 3% in oil paints. This seemingly small difference is a massive force at the microscopic level, creating constant sheer stress between the layers. Without a proper “bridge,” the acrylic film will inevitably be pushed off the oil surface. The solution is not to simply paint over the oil, but to create a permanent, non-reactive barrier that isolates the two incompatible films from each other.
This isolation coat must accomplish two things: first, it must adhere chemically to the cured oil paint, and second, it must provide a surface with sufficient mechanical tooth for the acrylic paint to grab onto. A simple gesso or primer will not work, as they are typically acrylic-based and will not form a stable bond with the oily substrate. Instead, a specific type of barrier, like shellac, is required to create a truly stable foundation for subsequent acrylic layers, effectively neutralizing the long-term chemical and physical conflict between the two mediums.
How to Glue Heavy Objects to Canvas Without It Sagging Over Time?
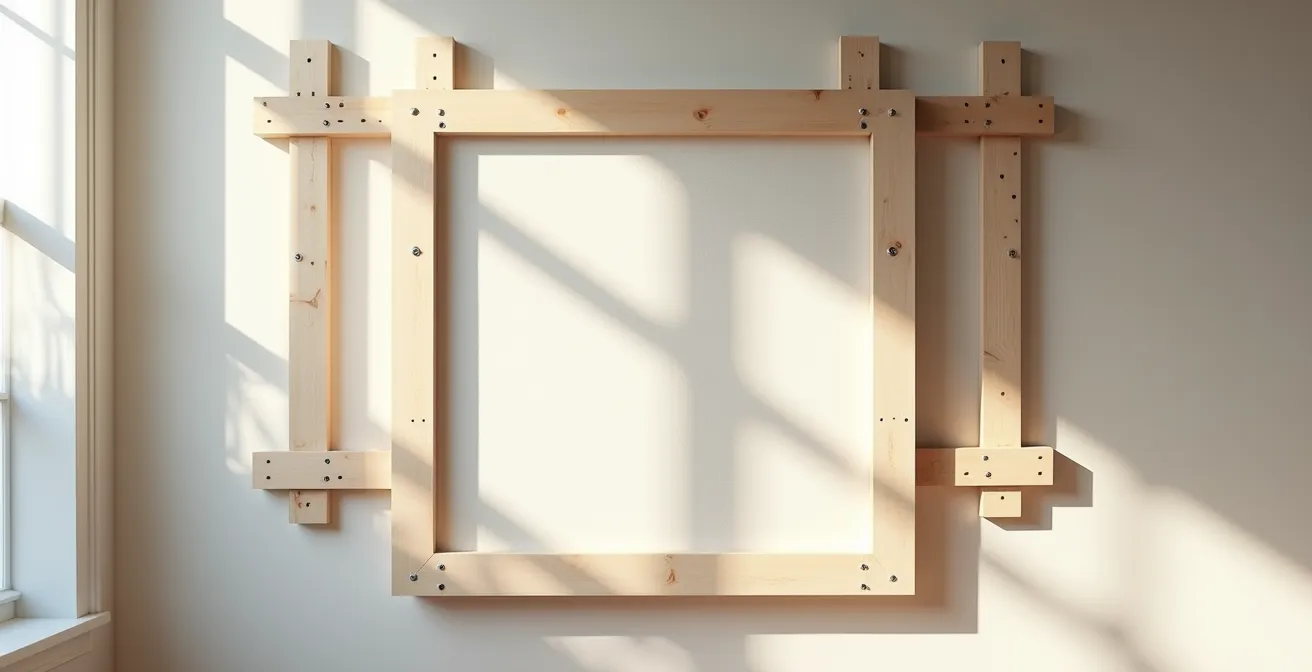
When a heavy object attached to a canvas begins to sag, the artist’s first instinct is often to blame the glue. While adhesive choice is crucial, the real culprit is usually a failure to account for physics. A stretched canvas is a flexible, dynamic surface with limited tensile strength. It’s designed to hold a thin layer of paint, not to bear a concentrated, heavy load. Over time, the constant pull of gravity on the heavy object will stretch the canvas fibers and cause the entire support to warp and sag, regardless of how strong the adhesive bond is.
The solution is a two-part strategy that addresses both structural support and chemical bonding. First, you must reinforce the canvas from behind to distribute the weight away from the flexible fabric and onto a rigid frame. This transforms the canvas from a load-bearing element into a purely aesthetic surface. A properly constructed back-bracing system provides the mechanical integrity needed to support significant weight over decades without deformation.
Once the structural problem is solved, you can select the correct adhesive. The choice depends on the weight of your object and the desired flexibility. A pH-neutral PVA is excellent for lightweight paper collage, but for a heavy metal or ceramic piece, you need an adhesive with superior shear strength like a two-part epoxy or even a construction-grade adhesive. Understanding the properties of each option is key to creating a permanent chemical bond that works in concert with your mechanical support system.
The following table compares common adhesives, providing a framework for choosing the right one based on your specific needs.
| Adhesive Type | Strength Rating | Flexibility | Archival Quality | Best Use Case |
|---|---|---|---|---|
| pH-neutral PVA | Medium | High | Excellent | Paper, light objects |
| Acrylic Gel Medium | Medium-High | Very High | Excellent | Mixed materials, medium weight |
| Two-part Epoxy | Very High | Low | Good | Heavy objects, rigid supports |
| Construction Adhesive | Maximum | Medium | Variable | Industrial-weight attachments |
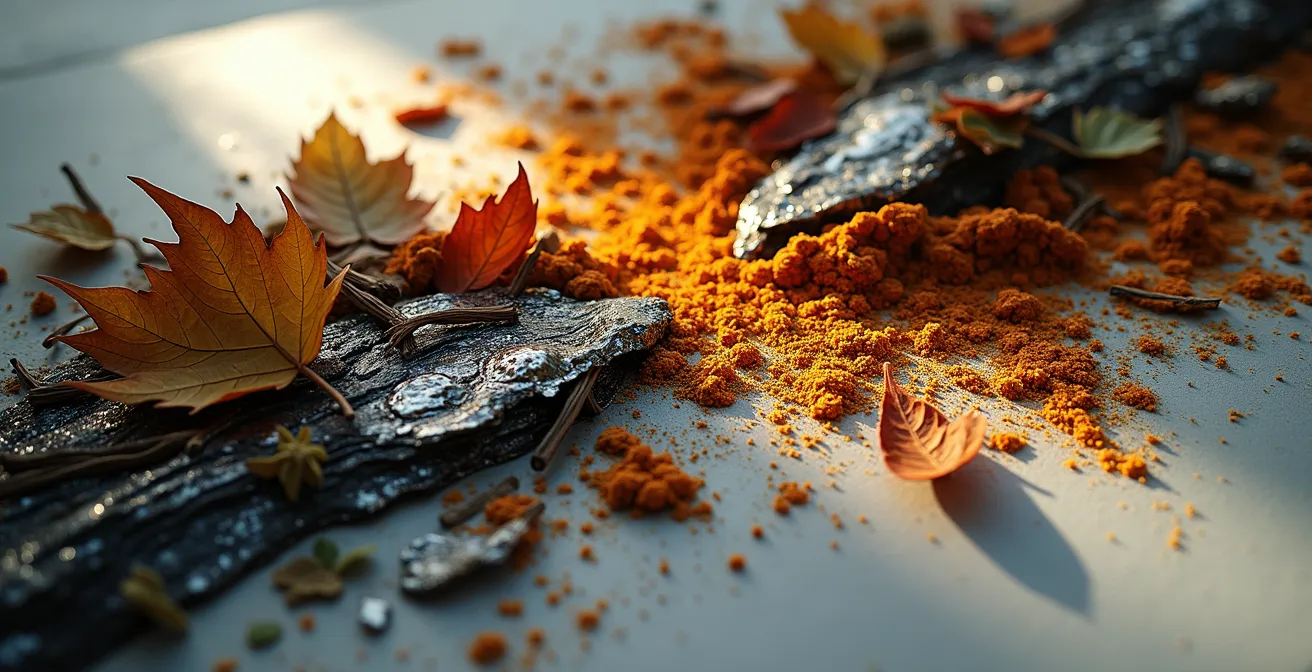
Organic Matter or Plastic: Which Decays Faster in a Mixed Media Piece?
In the world of mixed media, the longevity of your materials is a constant concern. When comparing organic matter (leaves, flowers, wood) to plastics, the answer is unequivocally clear: organic matter will always decay faster. Plastics are synthetic polymers designed for stability, resisting environmental degradation for hundreds or even thousands of years. Organic materials, by contrast, are inherently biodegradable. They are composed of cells that are a food source for bacteria, mold, and fungi. Once removed from their living system, they immediately begin a process of decomposition, accelerated by moisture, oxygen, and light.
This decay isn’t necessarily a flaw; for some artists, it’s a feature. The transient nature of organic materials can become a powerful conceptual element of the artwork itself, exploring themes of time, life, and impermanence. For those who choose this path, the focus shifts from preservation to documentation or controlled deterioration.
Case Study: Andy Goldsworthy’s Ephemeral Art
Contemporary artists like Andy Goldsworthy embrace transient materials as artistic statements, using natural decay as part of the creative process. His work demonstrates how organic materials (leaves, ice, stones) decompose naturally within days to months. He contrasts this with permanent documentation through photography, showing the artistic value that can be found in controlled deterioration. This approach reframes decay from a technical failure to an intentional artistic medium.
However, if your goal is archival permanence, you must actively fight this natural process. This requires creating an environment within your artwork that is hostile to biological activity. This can be achieved by completely sealing the organic element from moisture and oxygen, often by impregnating it with resin, or by using biocides to inhibit microbial growth. These interventions must be thorough; a single trapped air bubble or microscopic crack in a sealant can be enough to allow decay to begin. Therefore, the choice between organic and plastic materials is a fundamental artistic decision: are you creating a monument to permanence or a meditation on transience?
The Fume Hazard: Why Mixing Bleach and Ink creates Deadly Gas?
The quest for unique visual effects can sometimes lead artists down a dangerous path. One of the most hazardous—and surprisingly common—experimental mixtures is household bleach and ink. Many inks, particularly fountain pen inks and some markers, contain ammonia as a solvent or stabilizing agent. When chlorine bleach (sodium hypochlorite) comes into contact with ammonia, it triggers a rapid and dangerous chemical reaction that produces chloramine gas (NH₂Cl). This is not a minor irritant; it is a toxic gas that can cause severe respiratory damage, chest pain, nausea, and in high concentrations or for those with respiratory conditions, it can be fatal.
The danger is compounded by the speed of the reaction. Safety research indicates that chloramine gas forms within seconds when bleach contacts ammonia-based inks. This leaves virtually no time to react, especially in a poorly ventilated studio space. An artist might simply be trying to lighten an ink wash or create a bleached-out effect, unaware that they are generating a chemical weapon in their workspace. This underscores a critical principle for all experimental artists: never mix chemicals without understanding their reactive properties. The “what if I mix this?” approach, while creatively tempting, must be secondary to safety.
Fortunately, there are numerous safe and effective ways to achieve lightening or lifting effects without resorting to hazardous chemical cocktails. Isopropyl alcohol can be used to dissolve and lift many water-based inks, while hydrogen peroxide offers a gentle bleaching action without the toxic off-gassing. For professional results, artist-grade ink-lifting fluids are specifically formulated for this purpose. These alternatives allow for creative experimentation without risking your health.
This table outlines safer methods for achieving effects similar to bleach.
| Alternative Method | Safety Level | Effectiveness | Application |
|---|---|---|---|
| Isopropyl Alcohol (70%+) | High | Good for water-based inks | Apply with cotton swab |
| Hydrogen Peroxide (3%) | High | Moderate lightening | Spray or brush application |
| UV Sun Exposure | Very High | Gradual, natural fade | Controlled outdoor exposure |
| Artist Ink-Lifting Fluids | Very High | Professional results | Follow manufacturer guidelines |
Why Canvas is Too Weak for Plaster and What Panel to Use Instead?
Applying traditional plaster or thick texture mediums to a stretched canvas is a recipe for long-term failure. The problem lies in a fundamental mismatch of physical properties: plaster is rigid, heavy, and brittle, while canvas is flexible, lightweight, and designed to move. As a canvas responds to changes in temperature and humidity, its surface expands and contracts. The inflexible plaster cannot accommodate this movement. This constant, subtle tension inevitably leads to the plaster cracking, flaking, and eventually detaching from the support. The weight of the plaster also contributes to significant canvas sag, further stressing the material.
However, the desire for plaster-like textures on canvas has led to innovation in material science. As one case study shows, modern acrylic-based modeling pastes and flexible texture gels have revolutionized this process. These products are specifically engineered with acrylic polymer binders that remain flexible after drying, allowing them to move with the canvas. They mimic the aesthetic of traditional plaster but are chemically compatible with the support, with artists reporting success rates above 90% when using these alternatives versus traditional gypsum plaster. This is a prime example of choosing a material designed for the application.
For artists committed to using traditional, rigid plasters (like gypsum or marble plaster), the only viable solution is to abandon canvas entirely in favor of a rigid support. A rigid panel provides the stability necessary to prevent the cracking and delamination that occurs on flexible surfaces. The choice of panel depends on budget and archival goals, but all options must be properly sealed before applying plaster to prevent moisture from the plaster warping the wood and to block Support-Induced Discoloration (SID), where impurities from the wood leach into the gesso and plaster layers.
Action Plan: Selecting a Rigid Support for Plaster
- Good Option: Use MDF (Medium-Density Fiberboard) panels, ensuring they are thoroughly sealed with a primer like GAC100 or shellac to create a moisture barrier. This is a budget-friendly and stable choice.
- Better Option: Choose Cradled Birch Plywood Panels. The cradle provides superior strength and resistance to warping, making it a more robust choice for heavier applications.
- Best Option: For ultimate stability and archival quality, use Aluminum Composite Material (ACM) panels. They are immune to moisture and will not warp, providing a perfect, inert substrate.
- Professional Tip: Before priming, apply a sizing layer to the panel. This further isolates the support from the ground layers and is the best defense against Support-Induced Discoloration (SID).
- Surface Prep: After priming and before applying plaster, lightly sand the surface with fine-grit sandpaper. This creates a subtle “mechanical tooth” that ensures optimal adhesion of the plaster layer.
Oil or Acrylic: Which Medium Offers Better Color Depth for the Price?
The debate between oil and acrylic often revolves around drying time and handling, but a key differentiator for many artists is color depth. Oils are widely perceived as having richer, more luminous colors. This isn’t just an opinion; it’s based on optics. The “depth” of a color is related to how light interacts with the pigment suspended in its binder. The binder for oil paint is typically linseed oil, while acrylics use an acrylic polymer emulsion. The key difference between them is their refractive index—a measure of how much light bends as it passes through the medium.
As optical science research shows, linseed oil has a refractive index of approximately 1.48, which is very close to that of many traditional pigments. The acrylic polymer binder has a lower refractive index, around 1.45. This small difference means that when light hits an oil painting, more of it passes through the binder and reflects off the pigment itself, creating a sense of depth and luminosity. In acrylics, more light scatters as it passes between the binder and the pigment particles, which can result in a slightly less vibrant or flatter appearance, especially in darker colors. Additionally, acrylics are known to experience a “color shift,” appearing darker as the water in the emulsion evaporates and the binder clears.
Now, what about the price? Student-grade acrylics are almost always cheaper than student-grade oils, reinforcing the idea that acrylics are the more economical choice. However, this comparison is misleading. To achieve a color richness that competes with oils, artists must turn to professional-grade acrylics, which have a much higher pigment load and use higher-quality binders. As a case study on professional materials reveals, the cost differential narrows significantly at this level. High-end acrylic paints can easily match or even exceed the price of professional oils, with tubes of certain colors reaching $50-$100. The perceived economy of acrylics largely exists in lower-quality lines, where lower pigment concentration is precisely what contributes to their lack of color depth.
Montana Gold or Hardcore: Which Can is Better for Character Work?
For artists working with spray paint, especially on character-driven pieces, the choice of can is as important as the choice of color. Montana Colors offers two iconic lines, Gold and Hardcore, and while they may seem similar, they are engineered for fundamentally different purposes. The decision between them hinges on your specific style and workflow: do you prioritize detailed, blended work or crisp, fast execution? The primary difference lies in their pressure system and paint formula.
Montana Gold is a low-pressure system with an acrylic-based, matte finish paint. The low pressure gives the artist exceptional control, allowing for fine lines, soft fades, and subtle gradients. It’s the ideal tool for detailed work, rendering facial features, creating soft shadows, and blending colors smoothly. The matte finish diffuses light, which is often preferred for character work as it reduces glare and gives a more painterly, less “plastic” look. In contrast, MTN Hardcore is a high-pressure powerhouse. Its synthetic gloss enamel paint is designed for speed and coverage. The high pressure creates sharp, hard-edged lines perfect for bold outlines and quick, opaque fills. Its rapid drying time is built for layering quickly without muddying colors.
As the Montana Colors Technical Team states in their official documentation:
The power of Hardcore guarantees a unified output until the end. Its 142 shades offer intense colors whose gloss finish makes them more striking.
– Montana Colors Technical Team, Montana Colors Official Product Documentation
This “power” and “striking” gloss finish make Hardcore the go-to for work that needs to pop from a distance. The choice is strategic: Gold is for the nuanced “rendering” phase of a character, while Hardcore is for the impactful “lining and filling” phase. Many artists use both: Hardcore for the initial block-in and outlines, and Gold for the details and finishing touches.
This table breaks down their key performance differences for character work:
| Feature | Montana Gold | MTN Hardcore | Best For |
|---|---|---|---|
| Pressure System | Low-pressure precision | High-pressure power | Gold: Fine details |
| Paint Formula | Acrylic-based, matte | Synthetic gloss enamel | Gold: Blending; Hardcore: Durability |
| Line Quality | Soft, controlled | Crisp, hard-edged | Gold: Gradients; Hardcore: Outlines |
| Coverage Speed | Moderate | Very fast (32 sq ft/can) | Hardcore: Large fills |
| Drying Time | 10-15 minutes | 2-5 minutes | Hardcore: Quick layers |
Key Takeaways
- Material Incompatibility is Physical: Failures like peeling and cracking are often caused by differences in how materials expand and contract (dimensional stability), not just weak glue.
- Solve Structurally First, Chemically Second: Before choosing an adhesive, ensure your support system can handle the physical load. Reinforce flexible surfaces to prevent sagging.
- Control the Environment, Control the Outcome: Variables like temperature, humidity, and pressure are not minor details; they are critical factors that dictate the success of chemical processes like resin curing.
From Bubbles to Brilliance: Mastering a Crystal Clear Resin Finish
Achieving a flawless, glass-like finish in experimental resin art is the ultimate goal, but it’s often sabotaged by two primary enemies: bubbles and surface cloudiness. These issues are not random; they are predictable outcomes of uncontrolled variables during the mixing and curing process. Mastering resin requires you to think less like a painter and more like a lab technician, precisely controlling the environment. The most common flaw, micro-bubbles, are often introduced during mixing and become trapped as the resin’s viscosity increases. While a heat gun can pop surface bubbles, it cannot reach those suspended deep within the resin.
The only truly effective method for eliminating all bubbles is by using pressure. Placing the poured resin piece into a pressure pot and increasing the pressure to 60-80 PSI dramatically shrinks the size of any trapped air bubbles to a microscopic, invisible scale. As professional resin casting studies confirm, using 60-80 PSI pressure reduces bubble visibility to below 0.1mm, rendering them undetectable to the naked eye. This is a purely physical solution to a physical problem.
The second enemy, cloudiness or “amine blushing,” is a chemical problem caused by humidity. Moisture in the air can react with the curing agent (the amine part of the epoxy), creating a waxy or cloudy film on the surface. This is why maintaining a low-humidity environment (below 50% RH) is non-negotiable for achieving a crystal-clear finish. Likewise, temperature plays a critical role. Resin that is too cold is thick and traps more air during mixing, while resin that gets too hot from a large-volume pour (an exothermic reaction) can cure too quickly, yellow, and crack. By meticulously managing these critical variables, you can eliminate guesswork and produce consistently brilliant results.
Now that you understand the core scientific principles, the next step is to apply this chemist’s mindset to your own practice. Approach your next experimental piece not with hope, but with a hypothesis. Analyze your materials, control your variables, and transform your studio from a place of happy accidents into a laboratory for intentional innovation.