The premium price of a glazed oil painting reflects its reality as a complex optical engine, not merely the hours spent by the artist.
- Unlike direct painting, glazing builds luminosity by sculpting light through dozens of transparent layers, creating a depth that cannot be physically mixed or digitally replicated.
- This intricate, “stratigraphic” structure is more complex to conserve and requires specific, directed lighting to fully activate its inner glow, enhancing its preciousness.
Recommendation: Approach these works not as static images, but as intricate light-manipulating instruments that reward patient observation and demand careful stewardship.
In a world that prizes speed, the slow, deliberate art of oil glazing can seem anachronistic. A collector might reasonably ask why a painting that took months to complete—built from dozens of gossamer-thin layers—should command a significantly higher price than a vibrant, energetic work finished in a single session, or alla prima. The common answer, that “it takes more time,” is both true and profoundly incomplete. It mistakes the labor for the result, the hours for the alchemy.
The true value of a glazed painting is not a surcharge for the artist’s patience. It is the price of an object that transcends its materials. It is an investment in a unique, handcrafted optical engine. The artist, through a near-meditative process, is not simply applying color to a surface; they are constructing a labyrinth for light. Each transparent layer is a new corridor, a new chamber where light can enter, reflect, and refract before returning to the viewer’s eye, transformed and enriched. This is a level of complexity that a single, opaque layer of paint, no matter how skillfully applied, can never achieve.
This article will not merely list the steps of glazing. Instead, it will illuminate the very principles that create its value. We will explore the science of its glow, learn how to identify this masterful technique, understand its inherent fragility, and discover our role as collectors in preserving its light for generations to come. We will journey from the artist’s studio to the conservator’s lab, and finally, to the walls of a collection where the painting’s soul is truly revealed.
For those who prefer a visual demonstration of this patient craft, the following video offers a glimpse into the methodical process of applying transparent oil glazes to build form and color.
To fully appreciate the distinction and value of this technique, it is essential to understand the journey of light, the signs of true craftsmanship, and the responsibilities of stewardship. The following sections break down these crucial aspects for the discerning collector.
Summary: Unlocking the Value of Luminous Paintings
- Why Light Bouncing Through 20 Layers Creates a ‘Glow’ That Digital Can’t Mimic?
- How to Look at the Edges to See if an Artist Uses Real Glazing Techniques
- Thin Layers or Thick Paint: Which Surface is Easier to Restore After Damage?
- The Layering Mistake That Causes Paint to Separate from the Canvas
- Why You Need Directed Spotlights to Activate the Translucency of Glazes?
- Oil or Acrylic: Which Medium Offers Better Color Depth for the Price?
- Why Conservation Varnish Must Be Removable Without Harming the Paint?
- Varnish Layering: How the Final Coat Can Make or Break a Painting?
Why Light Bouncing Through 20 Layers Creates a ‘Glow’ That Digital Can’t Mimic?
The “glow” of an Old Master painting is not a myth or a happy accident; it is a predictable result of optical physics. Unlike the physical mixing of pigments on a palette, glazing achieves its effects through optical mixing. When you view a glazed painting, your eye is not seeing a single, solid color. Instead, it is receiving multiple streams of light that have traveled through different transparent layers, mixed in the air, and combined in your perception. A red glaze over a blue underpainting does not make purple on the canvas; it makes purple in your mind. This is what creates a sense of vibration and life that a single, flat layer of purple paint cannot replicate.
The science lies in the relationship between the pigment and the binder (the oil). Transparent pigments have a refractive index (RI) very close to that of the oil they are suspended in. This allows light to pass through them with minimal scattering. A 2023 study by Natural Pigments beautifully demonstrated this, showing that opaque pigments like titanium white (RI of 2.7) scatter light intensely, while transparent pigments allow it to penetrate deeply. The light dives through these translucent veils of color, strikes the bright, reflective ground layer at the bottom, and bounces back out, illuminating the layers from within. It is the very structure of the painting that becomes a source of light.
Furthermore, this effect deepens with time. It is a quiet, alchemical secret of oil painting that as the medium ages, its luminosity increases. In-depth research on oil paint optics shows that linseed oil’s refractive index slowly increases over decades, becoming even more transparent. This is why a Rembrandt or a Titian seems to possess a light that is not of our world; it is a light that has been patiently cultivated by chemistry and time, a quality that no digital screen or alla prima work can ever truly mimic.
How to Look at the Edges to See if an Artist Uses Real Glazing Techniques
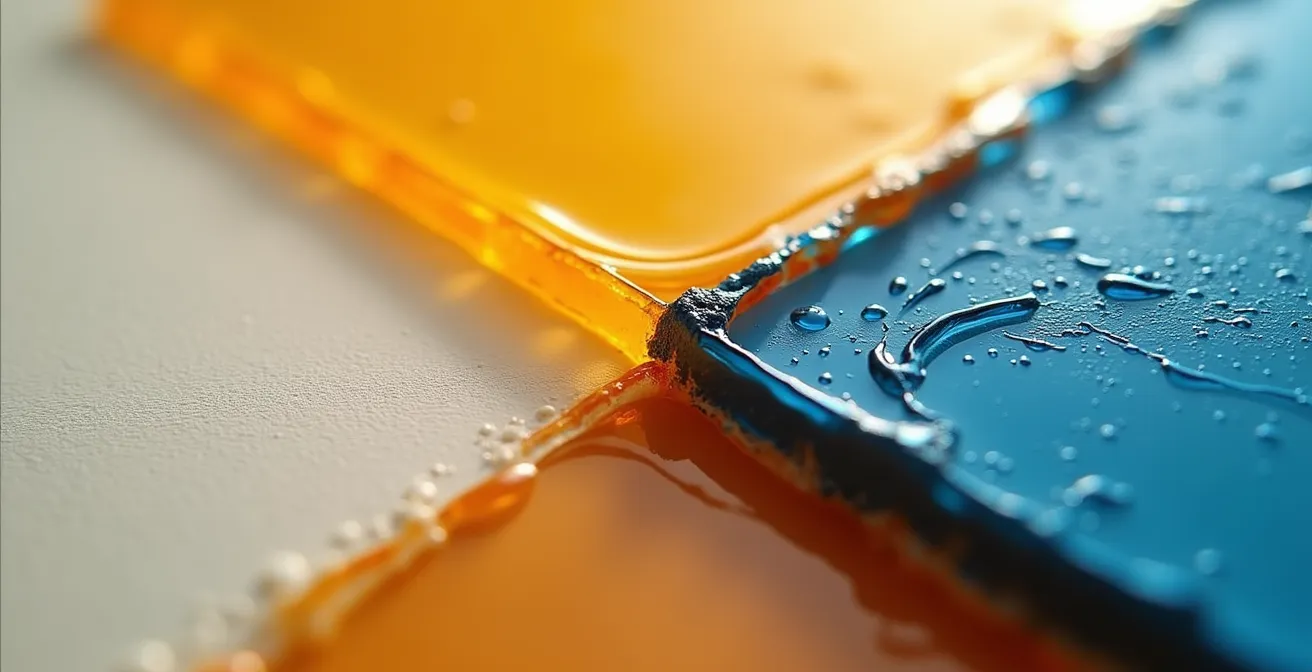
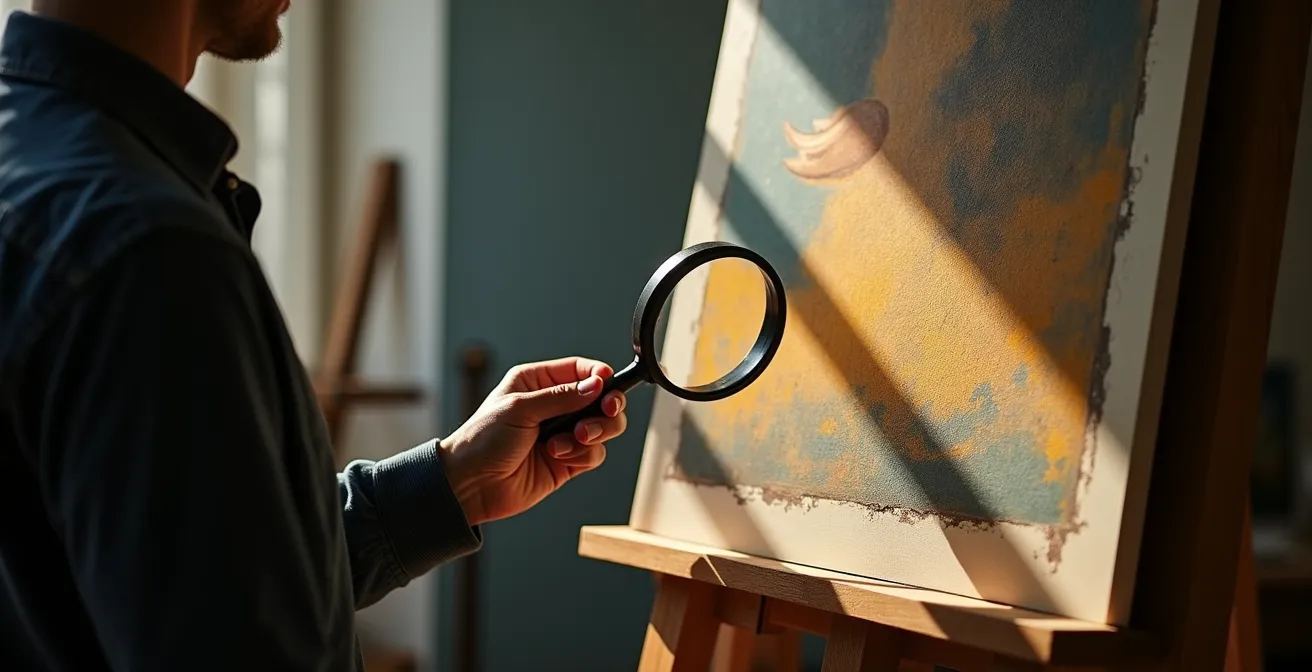
A discerning eye can learn to distinguish true glazing from clever imitations. The evidence is written on the surface of the painting, particularly at the boundaries between colors and forms. While an alla prima work celebrates the texture of the brush, a glazed painting seeks a smooth, enamel-like finish where the hand of the artist seems to disappear, leaving only the disembodied effect of color and light. To see this, you must look at the painting not as a picture, but as a physical object.
The key is to use “raking light”—a strong light source held at a very low angle to the surface. This technique exaggerates every minute peak and valley in the paint film, revealing the history of its construction. Under raking light, the thick, confident ridges of an alla prima brushstroke become immediately obvious. A glazed surface, by contrast, will appear far smoother and more unified, as the thin, liquid layers have settled and leveled out.
As the illustration suggests, this method reveals the fundamental difference in topography between the two techniques. Look closely at the edges where one color meets another. In a glazed work, you may find subtle “halos” or a soft transition where one transparent film overlaps another. You might even see the “ghost” of the underpainting peeking through the thinnest parts of the upper layers. This is the authentic signature of a painting built in stages, a depth that cannot be faked with a single stroke.
Action Plan: Identifying a Glazed Surface
- Position a single light source (like a phone flashlight) at a sharp 15-30 degree angle to the painting’s surface to create raking light.
- Observe the surface texture. A glazed work will show a smooth, almost enameled surface, while an alla prima piece will display visible ridges from the brushstrokes.
- Examine color boundaries closely. Look for the subtle “halos” or soft overlaps that indicate where one transparent layer has been laid over another.
- Look for ‘ghosting’. Check for faint traces of the underpainting that are visible through the thinner areas of the glaze, especially near the edges of forms.
- Check for color depth variations. The color in a glazed painting should feel deep and variable, not like a single, flat application of paint.
Thin Layers or Thick Paint: Which Surface is Easier to Restore After Damage?
From a collector’s perspective, the long-term stability and reparability of a work are paramount. Here, the comparison between glazed and alla prima surfaces reveals a crucial paradox. Intuitively, one might assume that a thick, robust impasto surface is sturdier than a delicate, thinly layered one. In reality, while both are vulnerable to damage, the restoration of a glazed painting is an exponentially more complex and costly endeavor, which in turn highlights its precious and intricate nature.
An alla prima painting is, structurally, a single entity. Damage, such as a scratch or a flake, affects one layer of paint. A conservator’s task, while difficult, involves “in-painting” on that single plane. A glazed painting, however, is a stack of distinct, transparent films. As Christine B. Wilda and her colleagues noted in the Heritage Science Journal, damage to such a work is not a surface issue; it is a “stratigraphic” problem. A single scratch can shear through a dozen or more historical layers, each with its own unique color and transparency.
Damage to a glazed painting is a ‘stratigraphic’ problem, damaging multiple, distinct historical layers, making in-painting a far more complex ‘microsurgical’ procedure.
– Christine B. Wilda et al., Heritage Science Journal – Visualising Varnish Removal Study
Restoring this is not painting; it is microsurgery. The conservator must rebuild the lost layers one by one, matching the precise color, thickness, and refractive index of each glaze to reintegrate the repair invisibly into the whole. It is a process that requires immense skill, scientific analysis, and time. This inherent complexity underscores the value of an intact glazed painting. It is not a simple, resilient surface but a delicate, layered construction, more akin to a stained-glass window than a painted wall. Its fragility is inseparable from its beauty.
The Layering Mistake That Causes Paint to Separate from the Canvas
The structural integrity of a multi-layered painting depends on one of the most fundamental laws of the craft: the “fat over lean” rule. To violate this principle is to build an artwork with a fatal flaw, a hidden tension that can, over time, cause the paint to crack, wrinkle, or even separate entirely from the canvas (delamination). Mastery of this rule is a non-negotiable requirement for creating a stable, archival-quality glazed painting, and it is another reason why such works are a testament to an artist’s skill.
The rule is simple in principle: each successive layer of oil paint must be more flexible than the one beneath it. “Fat” paint contains a higher ratio of oil to solvent, making it slow-drying and flexible. “Lean” paint has less oil and more solvent, making it fast-drying and rigid. The initial layers (the underpainting) must be lean, providing a stable, quick-drying foundation. The final layers, the glazes, must be fat, remaining flexible as they slowly cure over the rigid layers below. If a lean, fast-drying layer is placed over a fat, slow-drying one, the top layer will dry and harden while the layer beneath is still moving and oxidizing. This creates immense physical stress, inevitably leading to cracking and failure.
The following table, based on principles outlined by conservation resources, clarifies the application of this critical rule. Understanding this helps a collector appreciate the technical knowledge embedded in a stable, well-preserved painting.
| Layer Type | Oil Content | Drying Time | Result When Applied Correctly | Result When Rule Broken |
|---|---|---|---|---|
| Lean (First Layers) | Less oil, more solvent | 1-3 days | Stable, rigid foundation | Cracks when placed over fat layer |
| Fat (Final Glazes) | More oil, less solvent | 5-10 days | Flexible, luminous finish | Causes delamination if under lean layer |
| Medium-Rich Glazes | High medium ratio | 7-14 days | Deep optical effects | Poor adhesion on non-absorbent surfaces |
This structural logic is why glazing is such a patient art. An artist cannot rush. They must wait for each layer to cure sufficiently before proceeding, a process that can add days or weeks between applications. A painting that has survived for centuries without cracking is a silent testament to its maker’s adherence to these foundational laws of physics and chemistry.
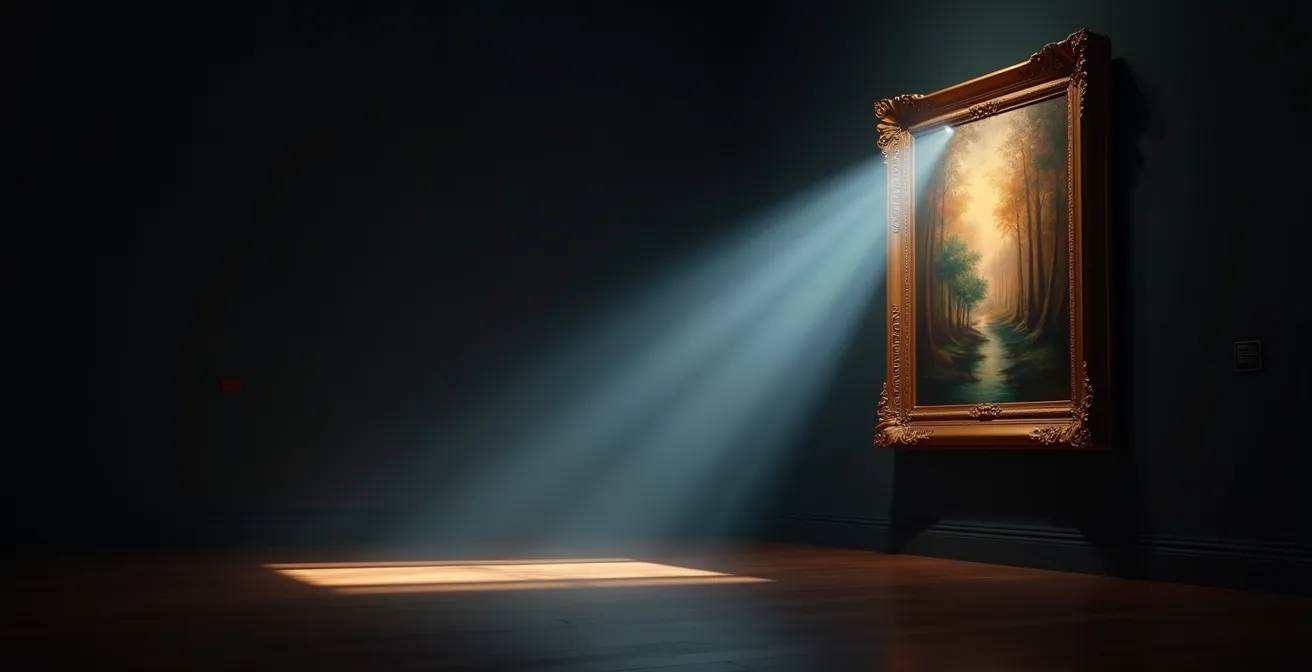
Why You Need Directed Spotlights to Activate the Translucency of Glazes?
A glazed oil painting is not a static object; it is an instrument waiting to be played, and the musician is light. Unlike an opaque painting that reflects light from its surface, a glazed work is designed to be illuminated. The full depth and luminosity of its optical engine are only revealed when it is lit correctly. Diffuse, ambient room light is often insufficient. To truly “activate” the painting and witness the glow for which it was designed, one must use directed, focused lighting.
A spotlight positioned at the correct angle does more than simply make the painting brighter. It sends a concentrated beam of light deep into the painting’s strata. This is the energy source that powers the optical engine. The light penetrates the transparent glazes, reflects off the gesso ground, and radiates back through the layers, causing the colors to glow from within. This is what we call “activated luminosity.” Changing the angle and intensity of the light can subtly alter the color relationships and the perceived depth, making the act of viewing an interactive and dynamic experience.
As a collector, the way you light a glazed painting is the final act of collaboration with the artist. You are completing the circuit they began to build. Proper lighting is not just a matter of presentation; it is a matter of revelation. It is the key that unlocks the work’s deepest secrets. For those investing in such a piece, understanding the principles of art illumination is essential to enjoying its full value.
- Choose bulbs with a Color Rendering Index (CRI) of 95 or above to ensure the colors are seen as the artist intended.
- Position the spotlight at a 30-degree angle to the surface; this is generally optimal for light penetration without creating glare.
- Select a color temperature that complements the work: a warm 2700K can enhance the golden tones of classical paintings, while a cooler 4000K might better suit the jewel-tones of a modern piece.
- Always use dimmable fixtures to adjust the intensity, and maintain a safe distance to prevent any heat damage.
Oil or Acrylic: Which Medium Offers Better Color Depth for the Price?
In the modern market, acrylic paint is often presented as a convenient, fast-drying, and less expensive alternative to oil. For many applications, it is a superb medium. However, when the specific goal is to achieve the profound, light-filled depth of traditional glazing, oil paint remains unequivocally superior. The difference is not one of quality, but of fundamental physics and chemistry. The value proposition of an oil glaze lies in an optical evolution that acrylics, by their very nature, cannot replicate.
Acrylic polymer is essentially a form of plastic. When it dries, it forms a stable, clear, and relatively static film. While optical studies demonstrate that acrylic binders possess excellent clarity, their refractive properties do not significantly change over time. An acrylic glaze will look much the same in fifty years as it does today. It offers permanence but not evolution. This is where oil paint reveals its singular, time-honored advantage.
Case Study: The Evolving Optics of Oil vs. Acrylic
In a long-term analysis of medium aging effects, artist and educator Will Kemp observed the distinct trajectories of oil and acrylic films. His findings from 2022 reaffirmed a long-held understanding among painters and conservators: as linseed oil ages and oxidizes over decades, its refractive index steadily increases. This process causes the oil binder to become progressively more transparent and glass-like. The result is that the painting’s colors appear to grow in saturation and luminosity over time. This natural, slow-burn enhancement of optical depth is the hallmark of Old Master paintings. Acrylics, in contrast, remain optically stable, lacking this unique, evolving quality that adds so much to the mystique and value of an aged oil painting.
Therefore, when a collector invests in an oil-glazed painting, they are not just buying a static image. They are acquiring an object that is in a slow, continuous state of becoming. It is a work of art that collaborates with time itself to deepen its own beauty. For the price, acrylics offer stability and brilliant color, but oils offer a living, breathing depth—a priceless quality for those who value the long arc of art history.
Key Takeaways
- The value of a glazed painting lies in its structure as an “optical engine,” not just the time taken to create it.
- True glazing can be identified by examining a painting’s surface with raking light to see its smooth, layered topography.
- The final varnish coat is not merely protective; it is a critical optical component that unifies the layers and determines the final appearance of depth and sheen.
Why Conservation Varnish Must Be Removable Without Harming the Paint?
The final varnish on a painting serves a dual purpose: it is both a protective shield and an optical lens. It saturates the colors, evens out the surface sheen, and protects the delicate paint film from dirt, abrasion, and atmospheric pollutants. However, over many decades, this protective layer inevitably ages. It can yellow, crack, and become opaque, obscuring the image it was meant to enhance. It is for this reason that the single most important quality of a conservation-grade varnish is its removability.
A varnish that cannot be removed without harming the paint beneath is a ticking time bomb. Traditional natural resins like Damar, while beautiful when fresh, have a known flaw: they can “cross-link” with the oil paint film over time, effectively fusing with the top layer of the painting. Removing such a varnish requires strong solvents that can easily dissolve the final, delicate glazes of the original work. This is why modern conservators and archival-minded artists prefer synthetic varnishes (like those based on acrylic or ketone resins) that are specifically engineered to remain chemically distinct from the oil paint, allowing them to be safely removed in the future with milder solvents.
Case Study: Precision Varnish Removal with FLIM Technology
The stakes in varnish removal are incredibly high, especially on a fragile glazed surface. A 2023 study from King’s College London showcased a groundbreaking technology that gives conservators an unprecedented level of control. They developed a portable, 4.8kg fluorescence lifetime imaging (FLIM) device using a 440nm diode laser. This tool allows conservators to monitor varnish removal in real-time, watching the chemical changes as solvents are applied. The technology, which offers 4.8x better contrast than traditional UV methods, enables a level of precision that helps prevent any damage to the priceless original paint layers beneath. This illustrates the immense scientific effort dedicated to rectifying the mistakes of past, non-removable varnishes.
For a collector, a painting finished with a stable, removable conservation varnish is a far more secure investment. It signifies that the artist not only had mastery of their creative technique but also a profound respect for the future life of the artwork, ensuring it can be properly cared for centuries from now.
Varnish Layering: How the Final Coat Can Make or Break a Painting?
The very last layer applied to a painting, the final varnish, holds the power to unify or destroy the optical effects so patiently built by the artist. This is not merely a protective coating; it is the final lens through which the entire work will be viewed. The choice of sheen—from high gloss to dead matte—is a critical aesthetic decision that profoundly impacts the perception of a glazed painting’s depth and luminosity. As the Winsor & Newton technical team notes, the varnish provides “a single, unified sheen” that is essential for the eye to read the disparate layers as a cohesive image.
A gloss varnish creates a smooth, highly reflective surface. It allows the maximum amount of light to penetrate down to the paint layers and reflect back, causing the colors to “pop” with unparalleled depth and saturation. This is the traditional choice for classical glazed works, as it amplifies the internal glow. A matte varnish, conversely, contains microscopic particles that scatter light at the surface. While this eliminates glare, it can be disastrous for a glazed painting, as it effectively frosts over the “window” into the painting’s depth, destroying the illusion of luminosity. Satin varnish offers a compromise, preserving some depth while reducing reflections.
The table below breaks down how these different finishes interact with the delicate optical structure of a glazed painting.
| Varnish Type | Surface Effect | Light Interaction | Impact on Glazes | Best Use Case |
|---|---|---|---|---|
| Gloss Varnish | Smooth, reflective plane | Maximum light penetration | Makes glazes ‘pop’ with depth | Traditional glazed works |
| Matte Varnish | Micro-particle texture | Scatters surface light | Can destroy depth illusion | Contemporary flat effects |
| Satin Varnish | Moderate sheen | Balanced penetration | Preserves some depth | Mixed technique paintings |
It is also crucial to distinguish the final, removable varnish from an “isolation coat.” An isolation coat is a permanent, non-removable acrylic layer applied over the finished painting *before* the varnish. Its sole purpose is to create a barrier that protects the paint from the solvents that will one day be used to remove the final varnish. An artist who uses both an isolation coat and a final, removable varnish demonstrates the highest level of archival practice and foresight.
Ultimately, a glazed painting’s value is a synthesis of art, science, and time. It is a testament to an artist’s mastery over their materials and their understanding of light itself. To acquire such a work is to become the custodian of a luminous secret, an object that rewards patient looking and promises to reveal its beauty for centuries to come.