The final varnish is not an aesthetic afterthought but a critical act of conservation; its success is measured not in gloss, but in its absolute, non-destructive reversibility.
- A conservation-grade varnish must be removable with solvents that do not affect the underlying, fully cured oil paint.
- Proper application, whether by brush or spray, is determined by the painting’s texture, and its timing is dictated by the slow, months-long chemical curing of the paint.
Recommendation: Treat the final varnish as a reversible, sacrificial layer. Prioritize its long-term removability over its immediate appearance to ensure the artwork’s future integrity and value.
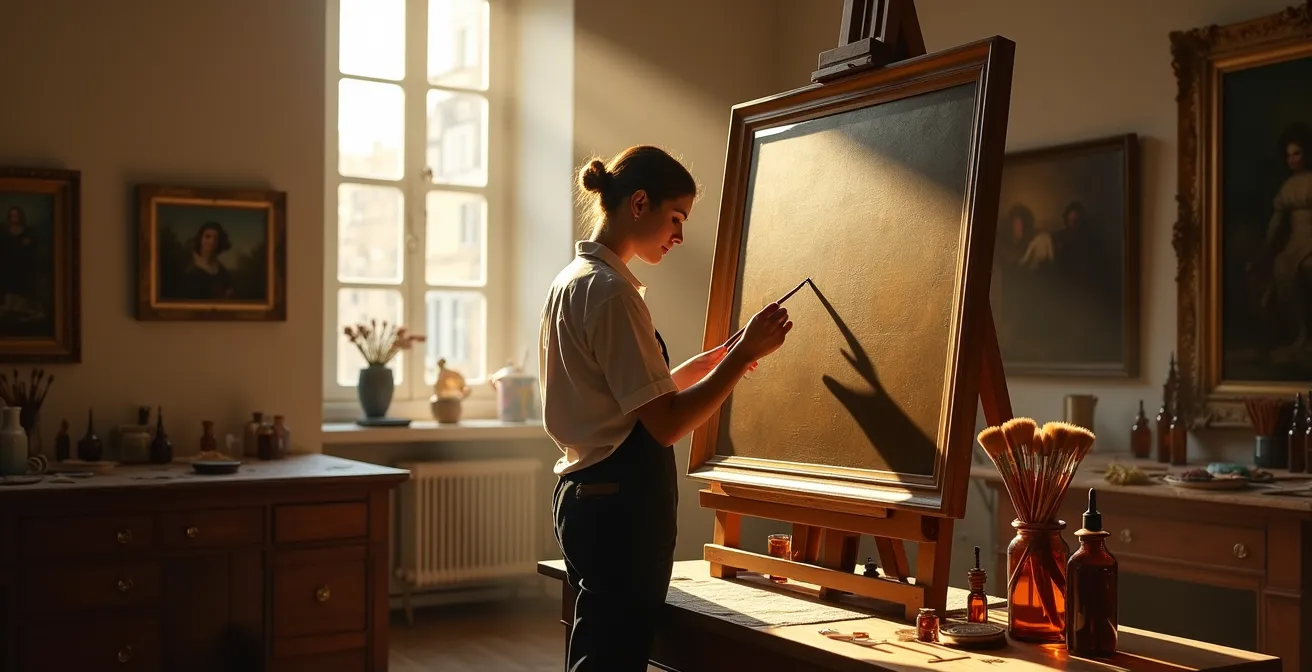
The final coat of varnish is the last touch, the moment an artwork transitions from a work in progress to a finished piece. For many, it’s a step shrouded in anxiety, a final hurdle where a single mistake—a speck of dust, a premature application—can compromise months of labor. The common advice is often deceptively simple: ensure the studio is clean, apply a thin coat, and let it dry. This approach, however, treats varnishing as a mere protective sealant, like lacquering a piece of furniture. It overlooks the profound dialogue between the varnish and the paint layer, a chemical and optical relationship that will evolve for decades.
This perfectionist’s guide moves beyond these platitudes. We will not simply discuss how to apply varnish. We will explore the fundamental principle that separates amateur finishing from master-level conservation: reversibility. The true purpose of a final varnish is to be a sacrificial, removable shield. It must protect the art from environmental damage while being capable of being completely stripped away by a future conservator without harming a single molecule of the original paint. Understanding this changes everything. It reframes the choice of varnish from a question of “what looks good?” to “what is safe for the art’s future?”
Therefore, the key is not merely learning a technique, but embracing a philosophy. This article will deconstruct the science of the final coat, from the chemical imperatives of curing times to the diagnostic techniques for spotting invisible flaws. We will analyze application methods not for their ease, but for their respect of the artist’s original texture, and differentiate the true luminosity of glazing from the superficial sheen of varnish. This is the invisible art of finishing, where the final act is not one of completion, but the first act of preservation.
For those who appreciate the meticulous restoration of classics in any field, the following 4K remastered video is also available.
This guide is structured to build your expertise methodically, from foundational principles to advanced techniques. The following sections will equip you with the knowledge to make impeccable decisions for the protection and presentation of fine art.
Contents: A Masterclass in the Art of Varnishing
- Why Conservation Varnish Must Be Removable Without Harming the Paint?
- How to Detect Streaks and Dust Trapped in the Varnish Layer?
- Spray or Brush: Which Varnish Application Preserves the Brushwork Texture?
- The ‘Tacky’ Error: What Happens When You Varnish Oil Paint Before It Cures?
- How to Use Retouch Varnish to Revive Dull Colors During the Painting Process?
- How to Look at the Edges to See if an Artist Uses Real Glazing Techniques
- Natural Matte Paint or Matting Agent Varnish: Which Looks More Authentic?
- Oil Glazing Mastery: Why Do Luminous Paintings Cost More Than Alla Prima Works?
Why Conservation Varnish Must Be Removable Without Harming the Paint?
The cardinal rule of modern art conservation is that any intervention must be reversible. A painting’s final varnish is not part of the original artwork; it is a separate, sacrificial layer designed to absorb the insults of time, such as dirt, pollutants, and UV radiation. Over decades, this layer will inevitably degrade, yellowing and obscuring the true colors beneath. The ability to safely remove this degraded film and apply a new one is what guarantees the painting’s long-term visual integrity. A permanent, non-removable varnish effectively condemns the painting to a slow, irreversible decline, as its own protective layer becomes its eventual prison.
The science behind removability lies in solvent compatibility. A conservation-grade varnish is formulated to dissolve in a mild solvent that has absolutely no effect on the underlying, fully cured oil paint layer. This selective solubility is the key. Research into material science, such as the Hansen Solubility Parameters, allows conservators to predict with remarkable precision which solvents will remove the varnish without touching the paint. Pioneering work has shown that with these parameters, 97% accuracy can be predicted for conservation solvent selection. This scientific approach ensures that cleaning is a controlled, safe procedure, not a dangerous gamble.
The consequences of using a non-removable varnish can be catastrophic. A tragic case at the Sint-Jan Berchmanscollege in Antwerp serves as a stark warning. A 19th-century wall painting was coated with a modern polymer varnish that degraded into a dark brown film, completely obscuring the art. Conservators discovered that every attempt to remove this durable layer also damaged the delicate original paint beneath. The varnish, intended to protect, had instead fused with the artwork, causing permanent and irreparable harm. This highlights the profound responsibility of the artist or collector: the choice of varnish is a decision that will echo for centuries.
How to Detect Streaks and Dust Trapped in the Varnish Layer?
A flawless varnish layer should be perfectly transparent and uniform, an invisible shield that enhances rather than detracts. However, minor imperfections like dust particles or application streaks can compromise the final presentation. Detecting these subtle flaws requires more than a casual glance; it demands a specific diagnostic technique used by professional conservators: inspection with raking light. This method involves positioning a single, strong light source at a very low angle (10-15 degrees) to the painting’s surface. This oblique illumination casts long shadows and creates sharp reflections from any surface irregularities, making otherwise invisible defects stand out dramatically.
Under raking light, different flaws reveal unique visual signatures. A trapped dust particle will appear as a tiny, sharp pinpoint of light, interrupting the smooth surface. A brush streak, where the varnish was applied unevenly, will manifest as a long, soft-edged distortion in the light’s reflection. Areas where the varnish has pooled will create intense, glaring hotspots. Mastering the art of reading these reflections is a critical skill for any artist or collector dedicated to a perfect finish. It allows for the precise identification and mapping of problems before any corrective action is taken.
Your Action Plan: The Raking Light Inspection
- Position a single LED light source at a 10-15 degree angle to the painting’s surface.
- Move the light systematically across the painting, examining the surface in small, 6-inch sections.
- Look for sharp, pinpoint reflections which indicate dust particles or other surface debris.
- Identify long, soft-edged distortions in the reflection that reveal subtle application streaks.
- Document all problematic areas with photographs for reference during any potential correction process.
For a clearer understanding, these visual indicators can be systematically categorized. The following table breaks down the appearance and reflection patterns of common varnish defects, offering a quick reference for diagnosis and correction strategy.
| Defect Type | Visual Appearance | Light Reflection Pattern | Correction Method |
|---|---|---|---|
| Dust Particles | Small dark spots | Sharp pinpoint reflections | Remove varnish, clean, reapply |
| Brush Streaks | Linear patterns | Long soft-edged distortions | Apply additional thin layer |
| Pooling | Thick glossy areas | Intense white glare spots | Gentle sanding, revarnish |
| Proper Application | Even sheen | Uniform reflection | No correction needed |
Spray or Brush: Which Varnish Application Preserves the Brushwork Texture?
The choice between applying varnish with a brush or from an aerosol can is not merely one of convenience; it is a critical decision that directly impacts the preservation of the painting’s surface texture. For paintings with a smooth, even surface, a skilled brush application can yield a beautiful, glass-like finish. However, for artworks with significant texture—such as heavy impasto, collage elements, or delicate, fragile surfaces—the brush becomes a liability. The physical action of brushing can flatten impasto peaks, dislodge fragile material, and cause varnish to pool in the crevices of the brushwork, creating an uneven, distracting sheen.
In these cases, a spray application is unquestionably superior. An aerosol varnish allows for the deposition of multiple, very thin layers of varnish without ever physically touching the paint surface. This non-contact method ensures that the original texture is perfectly preserved. As the technical experts at Winsor & Newton advise, the spray method is essential for maintaining the integrity of a textured surface. Their guidance underscores the importance of matching the application method to the artwork’s specific needs.
Aerosol varnishes are also a good choice if your work has a fragile surface that could be damaged by applying varnish with a brush. If you’ve worked in an impasto style, or with paint that has a rough texture, a spray will help you get an even coating of varnish and avoid the risk of creating bubbles or pools of varnish by applying it with a brush.
– Winsor & Newton Technical Team, Ultimate guide to varnishing your oil paintings
Ultimately, the goal is an even coating that protects without altering the artist’s original intent. For textured work, a spray application is the only method that can guarantee this outcome. It provides a light, even coat that follows the contours of the brushwork faithfully, preventing the pooling and bubbling that can occur with a brush. The even distribution from a spray can is the key to a professional finish that respects and preserves the soul of the painting’s surface.
The ‘Tacky’ Error: What Happens When You Varnish Oil Paint Before It Cures?
Patience is the most crucial, yet most often ignored, tool in a painter’s studio. The ‘tacky’ error—applying final varnish to an oil painting that is merely touch-dry but not fully cured—is a catastrophic and often irreversible mistake. Oil paint does not “dry” by evaporation; it cures through a slow chemical process called polymerization, where the oil oxidizes and cross-links to form a tough, stable film. This process can take months, or even years for thick passages. Applying a varnish layer over uncured paint traps the solvents from the varnish and, more importantly, prevents the oil paint from accessing the oxygen it needs to fully cure. The result is a disastrous chemical fusion between the two layers.
When varnish is applied prematurely, the solvent in the varnish can re-dissolve the topmost layer of the oil paint. The two layers meld into a single, inseparable film. The varnish can no longer be removed without also removing the original paint. Furthermore, as the trapped oil paint continues its slow, suffocated attempt to cure, it can cause the varnish layer to wrinkle, bubble, or remain permanently soft and sticky. This fundamentally compromises the structural integrity of the artwork. To avoid this, a waiting period of 6 to 12 months is the minimum requirement for a thinly painted oil work to cure sufficiently before a final varnish is applied.
In the unfortunate event that varnish is applied too soon, immediate action is critical, but the prognosis is poor. If caught within the first 24 hours while the varnish is still wet, it may be possible to gently blot the varnish off with a lint-free cloth dampened with a mild solvent. However, this is a high-risk procedure that can easily spread dissolved paint. Once the varnish has dried, the damage is essentially permanent from a conservation standpoint. The painting is now a compromised object, a testament to the fact that in oil painting, the clock cannot be rushed.
How to Use Retouch Varnish to Revive Dull Colors During the Painting Process?
During the creation of an oil painting, different passages of paint can dry at different rates. This often results in an uneven surface sheen, with some areas appearing dull and “sunken-in” while others remain glossy. This visual discrepancy makes it difficult to accurately judge color and value relationships as you work. This is precisely the problem that retouch varnish is designed to solve. It is not a final varnish, but a temporary, workable tool used *during* the painting process to unify the surface sheen and restore the deep, wet appearance of colors.
The key property of retouch varnish is its permeability. Unlike a final varnish, which creates an impermeable barrier, retouch varnish is formulated to be breathable. This allows the underlying oil paint layers to continue accessing oxygen from the atmosphere and proceed with their slow curing process. Applying a very thin layer of retouch varnish over a sunken-in area will immediately saturate the color, revealing its true hue and value as if it were freshly painted. This allows the artist to continue working on a surface that is visually consistent, ensuring harmonious color transitions in the final piece.
As explained by the technical experts at Jerry’s Artarama, the benefits extend beyond simple color restoration. It provides a fresh surface to paint on and offers a minimal layer of protection against dust while the work is in progress. However, it must be emphasized that retouch varnish is a temporary measure. It is a tool for the artist’s studio, not a substitute for a final conservation-grade varnish. A painting treated with retouch varnish will still need to cure completely for many months before the final, non-permeable protective layer can be safely applied.
How to Look at the Edges to See if an Artist Uses Real Glazing Techniques
For the discerning collector, distinguishing between the deep, luminous color of true glazing and the superficial gloss of a colored or aged varnish is a critical skill. Glazing is an intentional, advanced painting technique, while a discolored varnish is a sign of degradation. The clues to differentiate them often lie at the edges of the painting and in the way the color interacts with the underlying paint texture. Glazing is the application of a thin, transparent layer of paint over a dry, opaque layer. This technique, mastered by artists like Vermeer and Rembrandt, creates a unique optical effect where light passes through the transparent glaze, reflects off the opaque layer beneath, and illuminates the color from within.
A true glaze will appear integrated with the paint layer. When examining the edges of a color passage, you will see subtle, intentional gradations and a varied transparency that follows the brushwork. The color will seem to be *in* the paint. In contrast, a discolored varnish is a uniform, separate layer sitting *on top* of the entire painting. It will typically present as an even, yellow or brown cast that extends consistently across the whole surface, including the unpainted edges of the canvas. Its craquelure (cracking pattern) will be independent of the paint’s own cracks, forming its own distinct surface network.
The difference is fundamental: one is a mark of masterful technique, the other a symptom of age and chemical decay. Understanding this distinction is key to accurately assessing a painting’s quality, condition, and the artist’s original intent. The following table provides a clear comparison of the tell-tale signs for differentiating these two very different phenomena.
| Characteristic | Intentional Glaze | Degraded Varnish |
|---|---|---|
| Edge Appearance | Varied transparency, intentional gradations | Uniform yellowing across entire surface |
| Craquelure Pattern | Follows paint structure | Independent surface network |
| Color Distribution | Selective, enhancing specific areas | Overall amber/brown cast |
| UV Fluorescence | Variable based on pigments | Uniform green-yellow fluorescence |
Key Takeaways
- Reversibility is Paramount: A conservation varnish is a sacrificial shield, designed to be safely removed without harming the original artwork. Its removability is its most important quality.
- Patience is a Chemical Necessity: Oil paint cures by oxidation over 6-12 months. Varnishing prematurely causes irreversible damage by fusing the paint and varnish layers.
- Diagnosis Precedes Perfection: Using raking light is a non-negotiable diagnostic step to identify and correct subtle flaws like dust and streaks before they become permanent features of the finish.
Natural Matte Paint or Matting Agent Varnish: Which Looks More Authentic?
The pursuit of a matte finish presents a complex choice: should the effect be achieved through the natural properties of the pigments themselves, or by applying a varnish containing a matting agent? For the purist, the most authentic matte appearance comes from the paint itself. Certain pigments, like ultramarine blue, iron oxides, and other earth colors, naturally dry to a more matte or satin finish due to their particle size and shape. Preserving this inherent pigment matteness often yields a more subtle, varied, and optically authentic surface than one unified by a single topcoat.
A matte varnish, by contrast, achieves its effect through additives. As the technical team at Jackson’s Art explains, all varnishes begin as a glossy base. To create a matte or satin finish, a matting agent—typically a fine silica particulate or wax—is added. This agent settles at the bottom of the container and must be thoroughly stirred back into suspension before application, often for a minute or more. When applied, these particles create a microscopic texture on the surface that diffuses light, reducing glare. However, this can sometimes lead to a slight lightening of dark colors or a reduction in clarity, an effect known as “frosting.”
All varnish starts with a glossy base; matt varnish (and satin to a lesser degree) has matting agents added to it, either a dry particulate matter or a wax. … This means that you need to stir or shake the varnish well, often for much longer than you think – as much as two minutes.
– Jackson’s Art Technical Team, How to Varnish a Painting in Oil, Water-Mixable Oil or Acrylic
A strategic, hybrid approach often yields the most sophisticated result. This involves using gloss varnish on passages with dark, rich colors to maintain their depth and saturation, while selectively applying matte or satin varnish to other areas. Some artists create a custom satin finish by mixing gloss and matte varnishes (e.g., an 80% gloss to 20% matte ratio) to achieve a subtle sheen that feels more natural. The most authentic finish is rarely uniform; it is a carefully considered orchestration of sheens that serves the painting’s composition.
Oil Glazing Mastery: Why Do Luminous Paintings Cost More Than Alla Prima Works?
The art market places a premium on mastery, and few techniques demonstrate mastery as profoundly as oil glazing. The luminous, jewel-like quality of a painting by an Old Master is not an accident of genius, but the result of a painstaking, multi-layered glazing process. This stands in stark contrast to the *alla prima* (wet-on-wet) method, where a painting is completed in a single session. While *alla prima* works can be vibrant and expressive, glazed paintings possess a depth and luminosity that cannot be achieved in one sitting. This difference in labor, time, and technical complexity is a primary driver of their higher valuation.
Each glaze layer is a slow, deliberate act. It requires a deep understanding of pigment transparency, drying times, and optical physics. An artist might apply dozens of transparent layers, with each one needing to dry completely before the next is added. This process can take weeks or months, infusing the artwork with an immense investment of time and skill. The resulting painting has a complex structure where light interacts with multiple layers, creating a sense of inner radiance that a single paint layer can never replicate. This technical virtuosity is a tangible component of the artwork’s value.
Furthermore, the longevity of these works is a factor. A well-constructed, multi-layered painting is a robust object, but it also carries a legacy of required care. Over time, the varnish layers protecting these masterpieces will degrade. It is a known fact in conservation that paintings often require treatment if not attended to within the previous 50 years to remove discolored varnish. The cost and risk associated with conserving such a valuable and complex piece are significant. As the infamous restoration attempts on Rembrandt’s *The Night Watch* have shown, a mistake in removing an old, darkened varnish can cause abrasions and damage the original brushwork, permanently diminishing a priceless masterpiece. The high cost of glazed paintings reflects not only the skill of their creation but also the immense responsibility and expense of their preservation.
Applying this perfectionist mindset, from the initial choice of materials to the final, patient application of the varnish, is what separates a fleeting image from an enduring work of art. The final coat is your signature as a custodian of the work, ensuring it will be seen with clarity and brilliance for generations to come.